

Why Your DIY Fire Pit Area Needs Smart Planning
Most backyard fire pit failures stem from poor planning, not construction. Before digging, consider these non-negotiables:
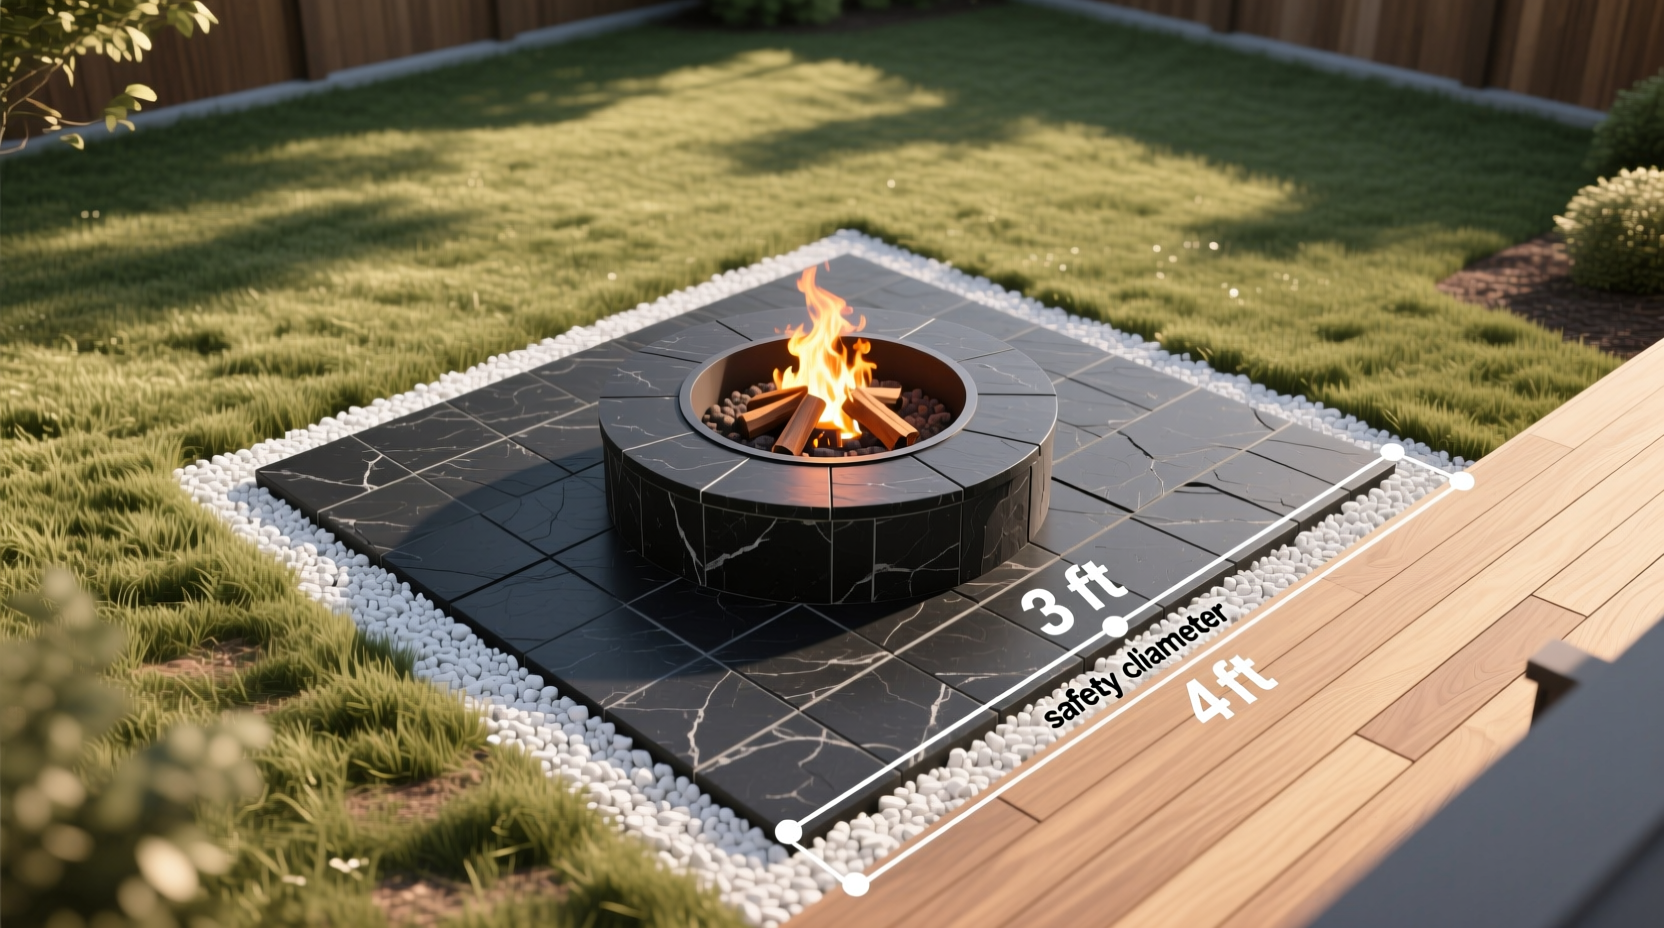
- Safety buffer zones: Maintain 10+ feet from structures (check local codes)
- Wind patterns: Position pit perpendicular to prevailing winds
- Soil composition: Avoid sandy or loose soil that won't contain heat
- Utility lines: Call 811 before any excavation
Material Selection: Budget vs. Durability Tradeoffs
Using reclaimed materials saves money but requires extra safety checks. Here's what actually works:
| Material Type | Cost Range | Heat Resistance | Installation Time |
|---|---|---|---|
| Reclaimed brick | $0-$50 | Moderate (cracks after 2 seasons) | 4-6 hours |
| Fire-rated concrete blocks | $120-$180 | Excellent (10+ years) | 3-5 hours |
| Steel ring kit | $90-$150 | Good (rusts in 3-5 years) | 1-2 hours |
Critical tip: Never use river rocks or concrete blocks not rated for fire—they can explode from trapped moisture. Fire-rated blocks have "UL 721" stamped on them.
Step-by-Step Construction Guide
Follow this sequence for a pit that won't shift or crack:
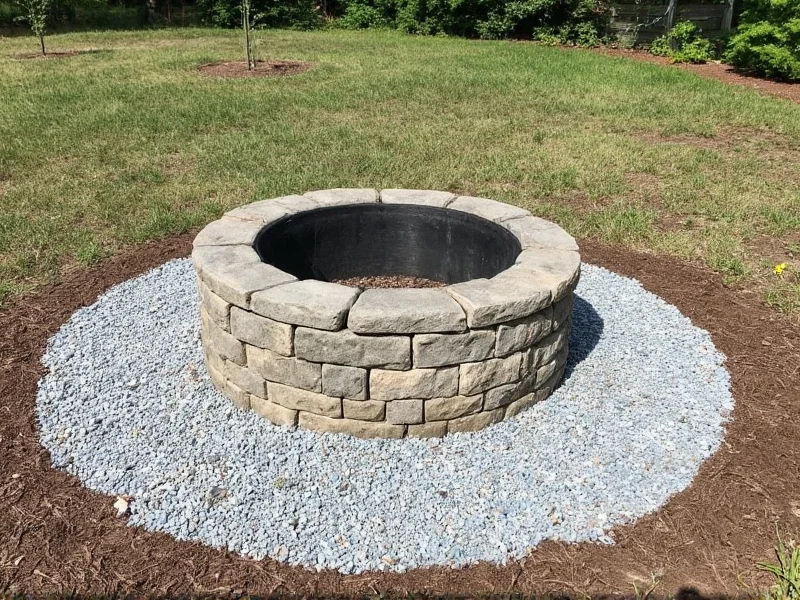
- Dig the base: 12" deep x 36" diameter hole with tapered sides
- Create drainage: Add 2" gravel layer, compact thoroughly
- Build containment wall: Stack blocks in staggered pattern (no mortar needed)
- Install heat shield: Line interior with 1" firebrick or lava rock
- Test burn: Start small fires for 3 days before full use
Safety Upgrades Most DIYers Skip
These inexpensive additions prevent 90% of backyard fire incidents:
- Ember guard: 36" steel mesh screen ($25) - stops sparks from escaping
- Thermal barrier: 6" gap between seating and pit edge
- Emergency kit: Keep garden hose + sand bucket within 5 feet
- Windbreak: Temporary stone wall on windward side
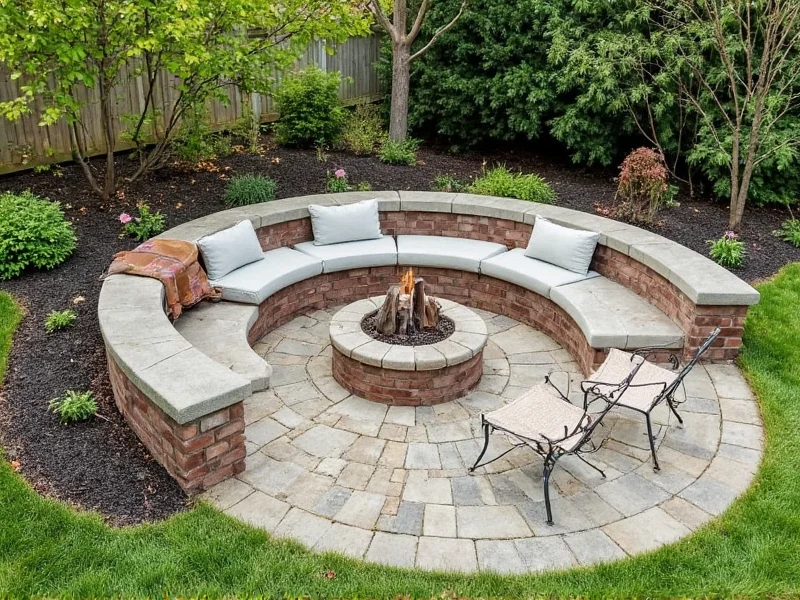
Design Ideas for Small Yards
Maximize limited space with these solutions:
- The pocket pit: 30" diameter for patios (use steel ring kit)
- Bench integration: Build seating into retaining walls
- Multi-level lighting: Solar path lights + hanging lanterns
- Seasonal flexibility: Add removable tabletop for summer dining
When to Call Professionals
DIY isn't always safe. Hire a contractor if:
- Your yard has slopes over 15 degrees
- Local codes require permits for pits over 24" diameter
- You're building near trees with low-hanging branches
Frequently Asked Questions
How deep should a DIY fire pit be dug?
Dig 10-12 inches deep for proper heat containment. Shallow pits risk embers escaping, while deeper than 14 inches reduces usable fire height. Always include a 2-inch gravel drainage layer at the bottom.
Can I use regular concrete blocks for a fire pit?
No. Standard concrete blocks contain moisture that turns to steam during heating, causing explosive cracking. Only use fire-rated concrete blocks stamped with UL 721 or purpose-built fire bricks. Reclaimed brick is acceptable if thoroughly dried for 2 weeks.
What's the safest fuel for DIY fire pits?
Hardwoods like oak or maple burn cleanest with minimal sparks. Never use gasoline, lighter fluid, or treated wood. For smoke reduction, season wood for 6+ months and keep logs under 6 inches in diameter. Propane inserts are safest for small spaces but require professional installation.
How do I maintain my DIY fire pit area?
After each use, fully extinguish fires with water (not sand) to prevent smoldering. Every spring, replace the gravel base if compacted, and inspect blocks for cracks. Cover the pit during winter with a steel lid—never use plastic covers that melt. Sweep ashes weekly to prevent buildup.


 浙公网安备
33010002000092号
浙公网安备
33010002000092号 浙B2-20120091-4