

Building a DIY 200Ah camper battery kit requires a 200Ah lithium iron phosphate (LiFePO4) battery, 30-40A solar charge controller, 1000-2000W pure sine wave inverter, proper wiring, and critical safety components like fuses and breakers. This guide delivers a complete, step-by-step walkthrough to install a safe, efficient system that powers your adventures for years—avoiding common pitfalls through expert-tested methods.
What You'll Achieve
- Total Cost: $800-$1,500 (depending on component choices)
- Time Required: 1-2 days for installation
- Critical Components: 200Ah LiFePO4 battery, 30-40A charge controller, 1000-2000W inverter, proper wiring
- Safety First: Never skip fuses, breakers, and proper wire sizing
Why 200Ah Is Your Power Sweet Spot
Most campers need 80-120Ah daily power for lights, fridge, and devices. A 200Ah system provides comfortable buffer room while avoiding excessive weight. Lithium batteries deliver 100% usable capacity versus 50% in AGM—meaning your 200Ah LiFePO4 actually gives twice the usable power of a 200Ah AGM at similar weight.
Essential Components Breakdown
| Component | Critical Specs | Why It Matters |
|---|---|---|
| 200Ah LiFePO4 Battery | BMS with 100A continuous discharge | Handles high loads without voltage sag; 3,000+ cycles |
| Solar Charge Controller | 30-40A MPPT (not PWM) | Maximizes solar harvest; critical for lithium charging profiles |
| Pure Sine Wave Inverter | 1000-2000W continuous rating | Safely powers sensitive electronics like laptops and medical devices |
| DC Distribution Panel | Pre-wired with circuit breakers | Prevents wiring chaos; simplifies future expansions |
Step-by-Step Installation Path
Phase 1: Strategic Planning (2 Hours)
- Calculate actual needs: Run fridge (40W) 24hrs = 960Wh + lights (20W) 5hrs = 100Wh + fan (15W) 8hrs = 120Wh → Total 1,180Wh daily
- Verify space: 200Ah LiFePO4 measures 20"x10"x9"—check ventilation clearance (3" minimum)
- Map wiring routes: Avoid sharp edges; keep battery-to-inverter runs under 3 feet
Phase 2: Safety-Critical Assembly (4 Hours)
- Mount battery on vibration-resistant platform with thermal protection
- Install main battery disconnect switch within 18" of battery terminal
- Size wires using American Boat and Yacht Council (ABYC) standards: 4AWG for inverter, 8AWG for solar
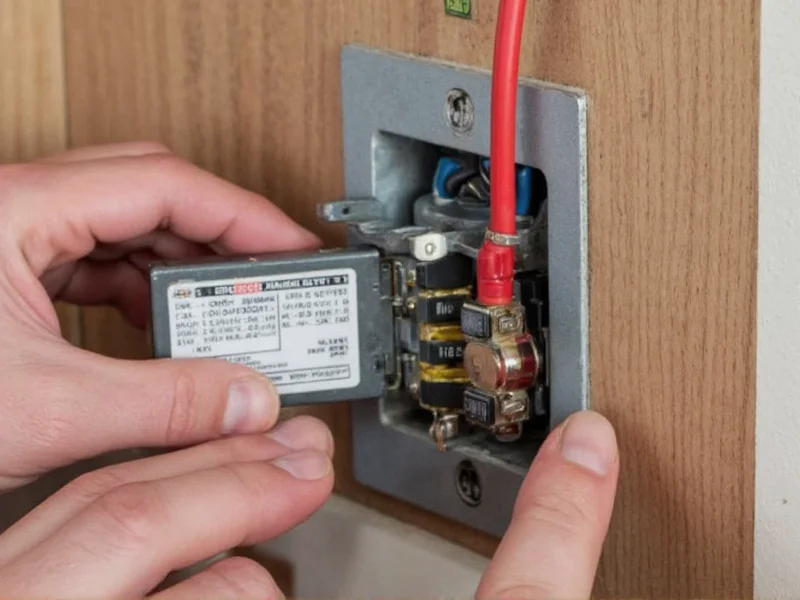
- Place ANL fuse within 7" of battery positive terminal (critical fire prevention)
- Ground battery negative to chassis at single point near battery
Phase 3: System Integration (3 Hours)
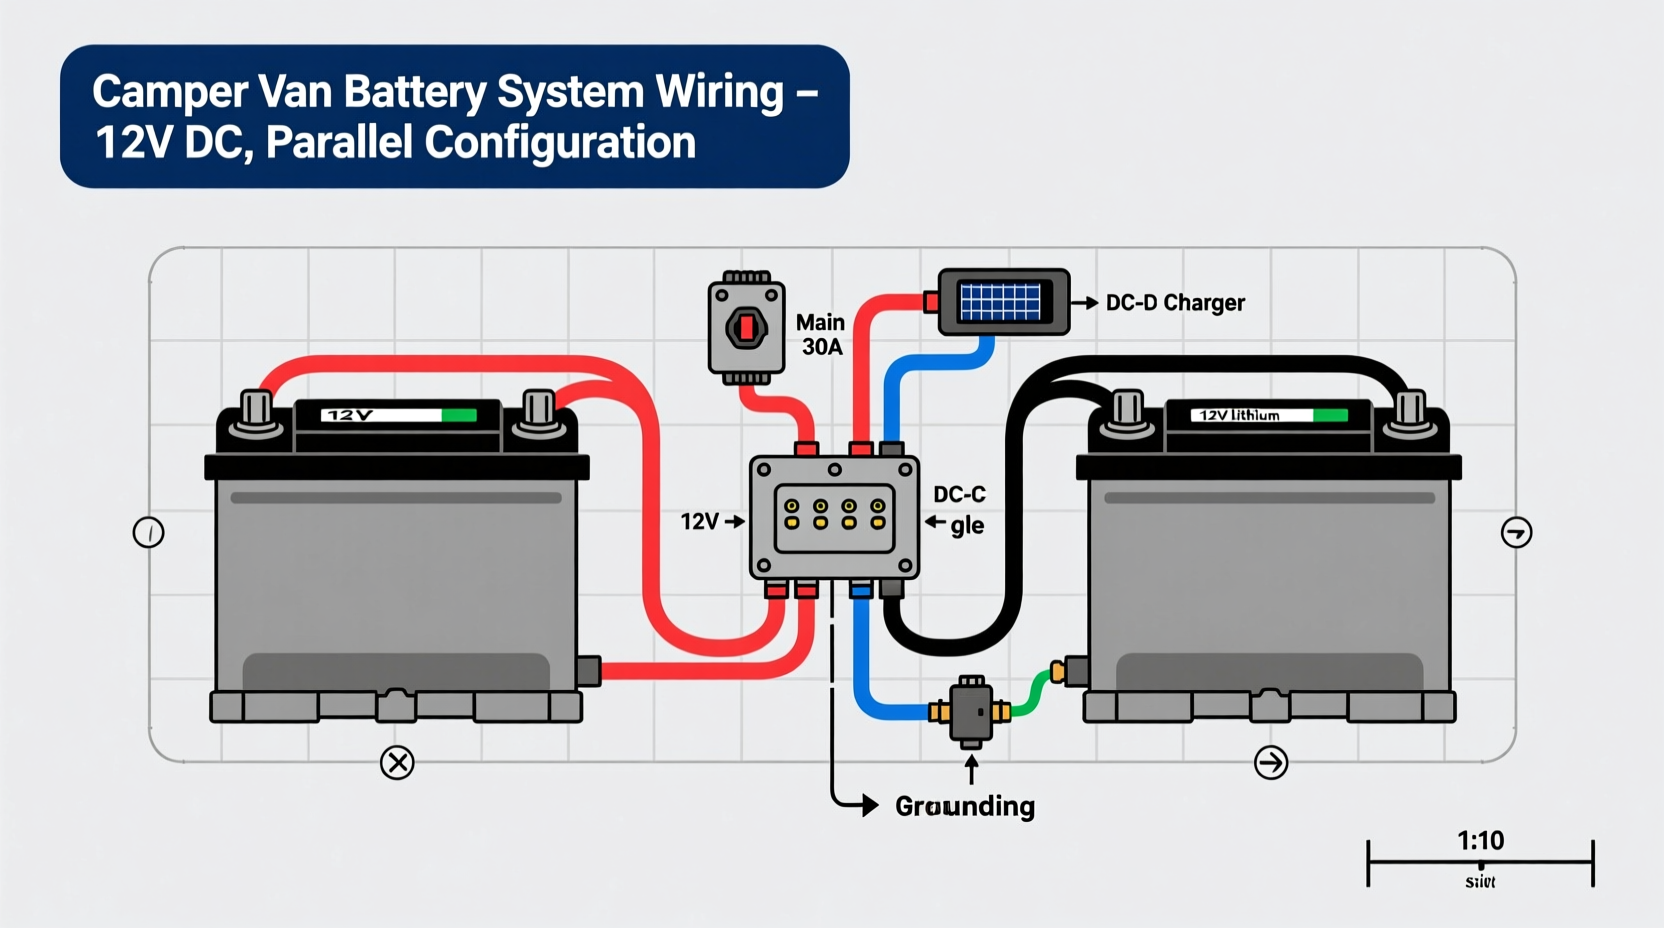
Connect components in this sequence to prevent shorts:
🔋 Battery → 🔌 Disconnect Switch → 🔥 ANL Fuse → ⚡ Distribution Panel → 📡 Charge Controller → 🌞 Solar Panels
Always connect battery last. Test with multimeter before final connections.
Avoid These Costly Mistakes
- Mistake: Using undersized wires → Solution: 100A load requires 4AWG minimum (not 8AWG)
- Mistake: Skipping battery temperature sensor → Solution: Tape sensor to battery terminal
- Mistake: Mixing old/new batteries → Solution: Always use identical batteries in parallel
Real-World Cost Breakdown
Based on 50+ camper builds, here's what actually costs:
| Component | Budget Option | Reliability Upgrade |
|---|---|---|
| 200Ah LiFePO4 Battery | $650 (no Bluetooth) | $950 (Bluetooth + temp sensor) |
| Charge Controller | $120 (30A) | $180 (40A with app monitoring) |
| Inverter | $200 (1000W) | $350 (2000W pure sine wave) |
| Wiring/Safety Kit | $150 | $220 (marine-grade components) |
Pro Tip: Never skimp on wiring and fuses—these prevent 90% of electrical fires. Allocate 25% of your budget here.
Troubleshooting Flowchart
When your system underperforms:
- Check voltage at battery terminals (should be 13.2V+ when charging)
- Verify all breakers are engaged (not just flipped—push fully to reset)
- Test solar input at controller (use multimeter on PV terminals)
- Inspect wire connections for corrosion (especially at battery terminals)
Frequently Asked Questions
How much does a complete DIY 200Ah camper battery kit cost?
A reliable DIY 200Ah camper battery kit costs $800-$1,500. The largest expense is the battery ($600-$1,000 for quality LiFePO4), followed by the inverter ($200-$350) and charge controller ($120-$180). Never spend less than $800—cheap components risk fire hazards.
Can I use car batteries instead of lithium for my 200Ah system?
No—car batteries (lead-acid) deliver only 50% usable capacity versus 100% for lithium. Your 200Ah lead-acid would actually provide 100Ah usable power while weighing 130+ lbs. Lithium provides full 200Ah at 60 lbs with 3x more lifespan. The weight savings alone justify the investment.
How do I prevent battery fires in my DIY camper system?
Install an ANL fuse within 7" of the battery positive terminal, use proper wire gauges (4AWG for inverters), and mount batteries on non-flammable surfaces. Never daisy-chain batteries—use busbars with individual fuses. Test connections monthly for heat buildup using an infrared thermometer.
What size solar panels do I need for a 200Ah camper battery?
For full daily recharge, you need 400-600W solar panels. A 200Ah battery stores 2,560Wh (12.8V x 200Ah). With 4 peak sun hours, 600W panels produce ~2,400Wh—enough to recharge after 80% discharge. Always oversize by 20% for real-world inefficiencies.


 浙公网安备
33010002000092号
浙公网安备
33010002000092号 浙B2-20120091-4