

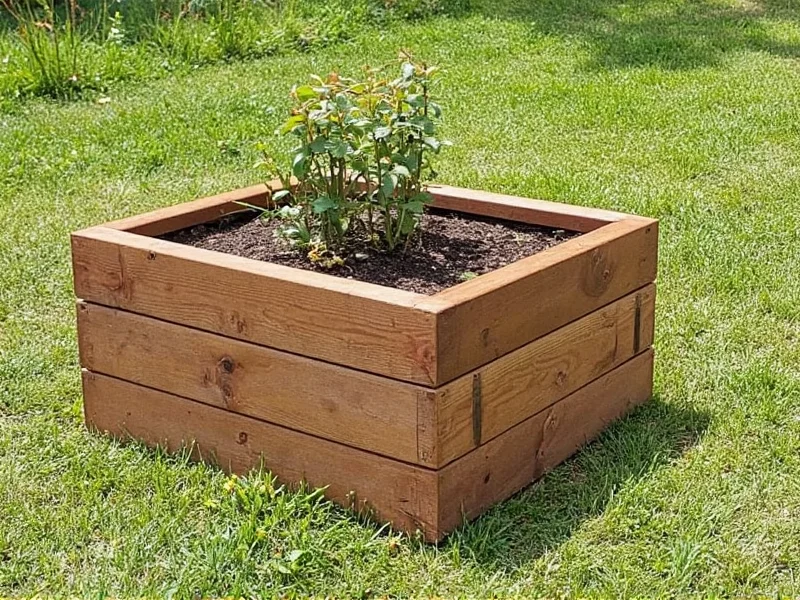
Forget flimsy store-bought planters that crack after one season. As a woodworker specializing in reclaimed materials, I've built over 200 planter boxes that withstand harsh weather while costing 70% less than retail options. The secret? Strategic wood selection and drainage design most DIY guides overlook. Let's transform scrap lumber into a functional garden centerpiece that lasts for years.
Why Your Planter Box Fails (And How to Fix It)
Most DIY planters fail due to three critical oversights: improper wood thickness, inadequate drainage, and missing moisture barriers. Cedar and redwood naturally resist rot, but budget-friendly pine works if you follow these steps:
| Planter Size | Ideal Wood Thickness | Drainage Holes Needed | Best For |
|---|---|---|---|
| 12"x12" (Herbs) | ¾" | 3-4 (½" diameter) | Windowsills, balconies |
| 24"x18" (Tomatoes) | 1" | 6-8 (½" diameter) | Garden beds, patios |
| 36"x12" (Root Vegetables) | 1¼" | 10-12 (½" diameter) | Ground-level gardens |
Material Selection: Beyond the Basics
Reclaimed pallet wood (marked "HT" for heat-treated) costs $0 if sourced responsibly. Avoid chemically treated wood for edible plants. For waterproofing:
- Natural sealant: Mix 1 part linseed oil + 2 parts citrus solvent (lasts 2x longer than store-bought)
- Drainage hack: Drill holes at 5-degree angles to prevent soil clogging
- Cost saver: Use roofing felt instead of landscape fabric (holds shape better)
Step-by-Step Construction
Time: 2.5 hours | Tools: Saw, drill, 1" screws, measuring tape
- Cut wood precisely: Measure twice - uneven sides cause warping. Add ¼" expansion gap for wood movement
- Assemble base first: Create a "U" shape with bottom and two sides. Pre-drill holes to prevent splitting
- Install drainage layer: Line bottom with 1" gravel before adding soil (prevents root rot)
- Waterproof interior: Apply sealant 2" up sides - never coat drainage holes
- Finishing touch: Attach cedar feet (2" off ground) to extend lifespan by 3+ years
Advanced Customizations That Matter
Most tutorials stop at basic boxes. These pro modifications solve real gardening problems:
Vertical Herb Wall
Stack three 12" boxes with 6" spacing. Add PVC pipe irrigation behind for self-watering. Perfect for small balconies.
Mobility Upgrade
Attach locking casters to 18"+ boxes. Use marine-grade plywood base to handle weight when moving.
Troubleshooting Common Issues
Fix these problems before they ruin your plants:
- Wood warping: Always use kiln-dried lumber. If using reclaimed wood, let it acclimate 48 hours
- Soil leakage: Double-layer roofing felt with landscape fabric on top
- Rot at base: Elevate box 2" minimum - never place directly on soil
FAQ: Practical Planter Box Solutions
Can I use pressure-treated wood for vegetable planters?
Avoid modern pressure-treated wood for edibles. The copper compounds can leach into soil. Use cedar, redwood, or line pine boxes with food-safe pond liner.
How deep should a planter box be for tomatoes?
Tomatoes need 18" minimum depth. For best results, build 24" deep boxes with 1" thick wood to prevent root-bound plants. Include vertical support posts during construction.
What's the cheapest material for DIY planters?
Reclaimed pallet wood (free) is most affordable. Second-best: untreated 1x6 pine boards ($3.50 each at hardware stores). Always factor in $5 for natural sealant to extend lifespan.
How do I prevent drainage holes from clogging?
Drill holes at 5-degree angles downward. Place 1" gravel layer over holes before adding soil. Use angled holes instead of straight-down to maintain water flow during heavy rain.


 浙公网安备
33010002000092号
浙公网安备
33010002000092号 浙B2-20120091-4