

You can create custom picture frames for under $10 using basic tools and recycled materials, saving 50-70% compared to store-bought options while adding personal style to your space. This guide reveals five beginner-friendly DIY frame methods using reclaimed wood, cardboard, and household items—with no power tools required for most projects.
Why Craft Your Own Frames? Beyond Cost Savings
DIY framing isn't just about economics—it's a creative solution for unique artwork dimensions, sustainable home decor, and personalized gifting. Unlike mass-produced frames, handmade versions accommodate unconventional sizes like Polaroid photos or children's artwork while reducing landfill waste. According to the EPA, 15% of household waste consists of reusable wood and cardboard—perfect for framing projects.
5 Practical DIY Frame Types for Every Skill Level
Choose your project based on available tools and materials. All methods include precision sizing techniques to prevent common alignment errors.
Cardboard Canvas Frames (Zero Tools Needed)
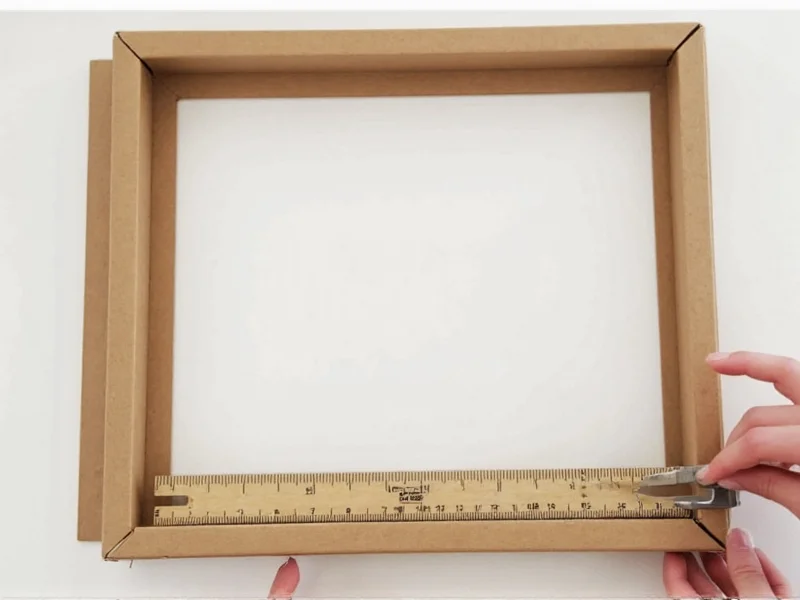
- Best for: Temporary displays or kids' art
- Time: 20 minutes
- Cost: $0 (using shipping boxes)
- Pro tip: Layer 3 cardboard sheets with PVA glue for rigidity
Reclaimed Wood Shadow Boxes

- Best for: 3D objects like pressed flowers
- Time: 2 hours
- Cost: Under $5 (salvaged lumber)
- Pro tip: Sand with 220-grit paper before assembly
Upcycled Material Frames
- Book pages: Decoupage onto foam board
- Wine corks: Glue in mosaic pattern
- Scrap fabric: Wrap stretcher bars
Essential Material Checklist
| Material | Beginner Option | Eco-Upgrade | Cost Savings |
|---|---|---|---|
| Frame base | Cardboard | Reclaimed pallet wood | 90% vs new wood |
| Adhesive | White glue | Flour paste (DIY) | 100% |
| Backing | Cardstock | Old cereal boxes | 100% |
Step-by-Step: Building a Reclaimed Wood Frame
Follow this foolproof method for professional results without miter saws:
- Measure twice: Cut wood 1/8" longer than artwork using handsaw
- Dry-fit assembly: Arrange pieces with painter's tape
- Join corners: Apply wood glue, clamp for 1 hour
- Reinforce: Insert 1" brad nails at 45° angles
- Finish: Rub with vinegar-soaked steel wool for weathered look
Avoiding Costly Mistakes: Pro Insights
Most DIY framing fails happen at the measurement stage. Always:
- Account for 1/4" gap between artwork and frame lip
- Test stain on scrap wood first (reclaimed lumber absorbs unevenly)
- Use acid-free tape for artwork mounting to prevent yellowing
For non-rectangular art, create a template from kraft paper before cutting materials. This prevents $20+ material waste from mismeasurement—a common beginner error observed in craft forums.
Customization That Elevates Your Work
Transform basic frames with these sustainable techniques:
- Natural dyes: Steep avocado pits for blush tones
- Texture: Press dried leaves into wet paint
- Hardware: Repurpose drawer pulls as corner accents
When to Choose DIY vs Professional Framing
DIY shines for casual displays under 16x20", but consider professionals for:
- Valuable artwork requiring UV glass
- Museum-standard acid-free mounting
- Frames over 24" requiring structural support
FAQ: DIY Frame Essentials
Can I make frames without power tools?
Yes—cardboard frames require only scissors and glue. For wood, use a handsaw and sandpaper. Reclaimed pallet wood often comes pre-cut to standard sizes.
How do I prevent warping in wooden frames?
Seal all wood surfaces with diluted white glue (1:1 water ratio) before assembly. This blocks moisture absorption that causes warping.
What's the most sustainable frame material?
Salvaged wood from construction sites or shipping pallets (ensure they're heat-treated, not chemical-treated). Cardboard frames are fully recyclable after use.
How do I hang heavy DIY frames securely?
Use two offset wall hooks with 50lb capacity each. For frames over 5lbs, mount directly into wall studs using toggle bolts.


 浙公网安备
33010002000092号
浙公网安备
33010002000092号 浙B2-20120091-4