

Why Build Your Own Fire Pit?
Creating a DIY fire pit offers significant advantages over store-bought models. You'll save 40-60% compared to pre-fabricated options while gaining complete design flexibility. According to the National Fire Protection Association, properly constructed DIY fire pits using non-combustible materials significantly reduce fire risks when following basic safety protocols. The average homeowner spends $150-$300 on materials for a durable, long-lasting fire feature that enhances property value.
Safety First: Non-Negotiable Guidelines
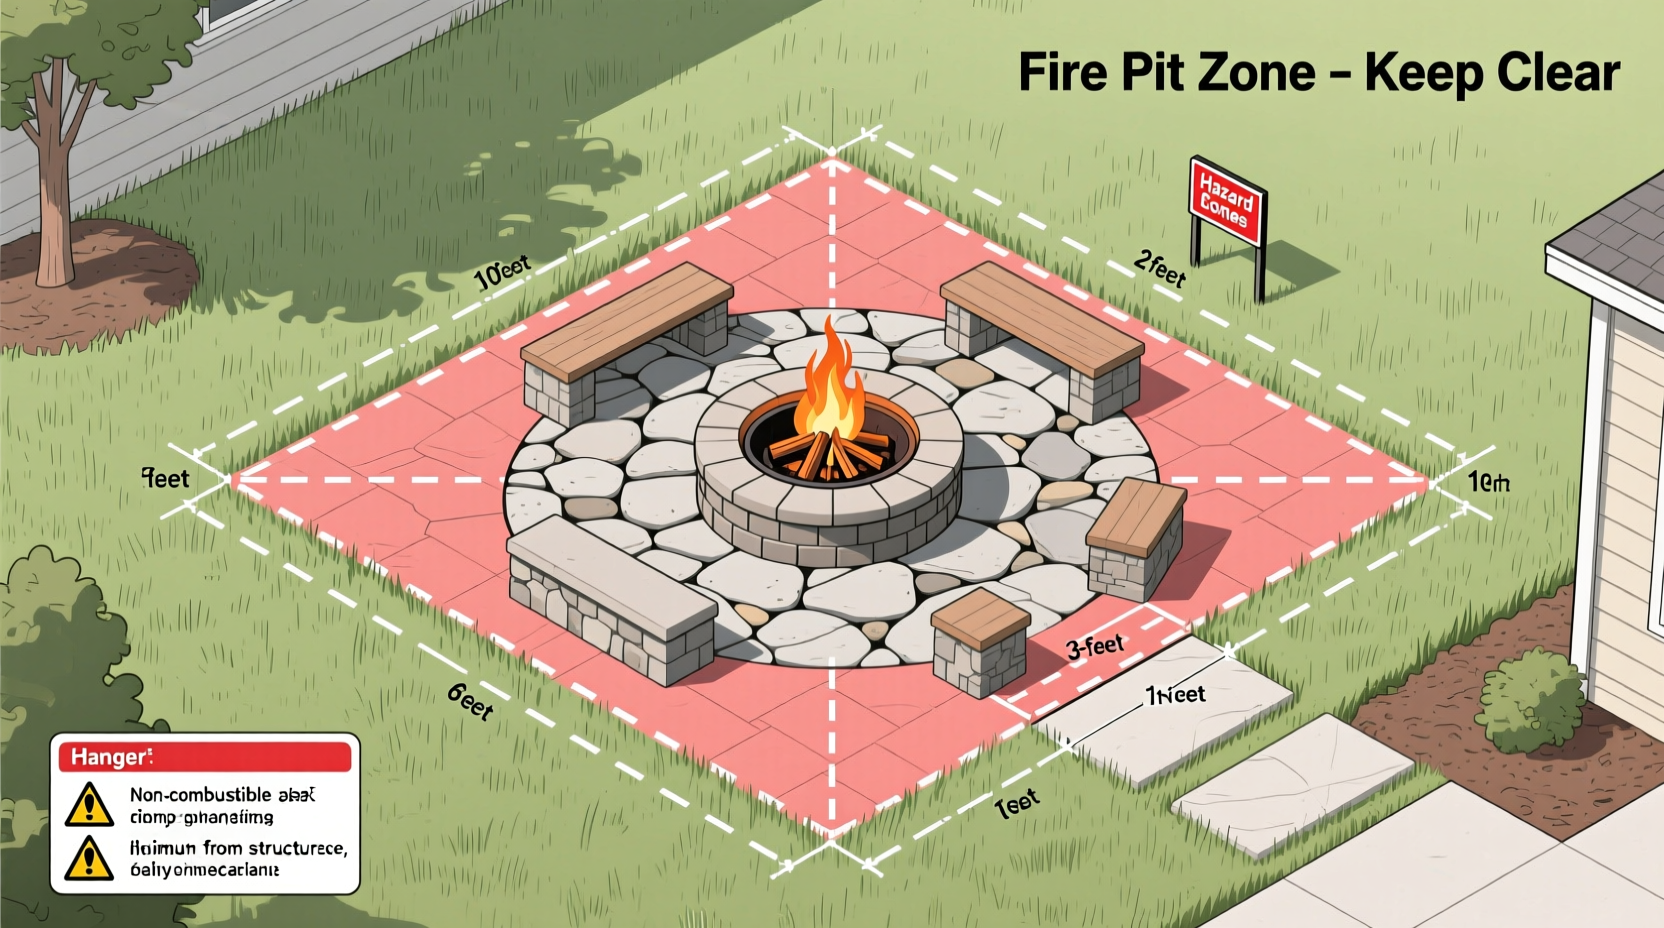
Before selecting your design, understand these critical safety requirements that prevent 95% of common fire pit accidents:
Essential Safety Checklist
- Maintain minimum 10-foot clearance from structures and trees
- Check local burn regulations (70% of municipalities have specific fire pit rules)
- Never use flammable liquids to start fires
- Install spark screen for pits taller than 12 inches
- Keep garden hose or fire extinguisher within 5 feet
Fire Pit Types Compared
| Type | Cost Range | Build Time | Best For |
|---|---|---|---|
| In-Ground | $50-$150 | 3-5 hours | Permanent installations, larger yards |
| Brick/Stone Ring | $100-$250 | 6-8 hours | Custom designs, medium skill level |
| Metal Ring | $75-$200 | 2-4 hours | Beginners, temporary setups |
| Reclaimed Material | $20-$100 | 4-6 hours | Eco-conscious builders |
15 Creative DIY Fire Pit Ideas
1. The Budget Concrete Ring
Cost: $65 | Time: 4 hours | Skill: Beginner
Using precast concrete landscape rings creates a professional-looking fire feature in minimal time. This easy backyard fire pit solution requires no special tools and can be assembled in one afternoon.
- 1x 36-inch concrete landscape ring ($40)
- 100 lbs lava rock ($15)
- 4x cinder blocks ($10)
Dig a 6-inch deep hole matching the ring's diameter. Level the base with sand, set the ring, then fill with lava rock. The cinder blocks create a stable seating perimeter.
5. Reclaimed Brick Circle
Cost: $120 | Time: 7 hours | Skill: Intermediate
This sustainable DIY fire pit idea uses salvaged bricks for a rustic, timeless look. Construction follows ancient masonry principles that ensure stability and heat resistance.
- 80 reclaimed bricks ($0 if sourced locally)
- 1/2 cubic yard fire sand ($35)
- 10 lbs refractory mortar ($25)
- Steel fire ring ($60)
Dig a 14-inch deep, 42-inch diameter hole. Create a 4-inch gravel base, then 2-inch sand layer. Lay bricks in a circular pattern with 1/4-inch gaps, using mortar between layers. Install the steel ring before final assembly.
9. The Portable Steel Drum
Cost: $45 | Time: 2 hours | Skill: Beginner
Perfect for renters or small spaces, this temporary fire pit solution uses a modified steel drum that can be moved seasonally.
- 55-gallon steel drum ($25)
- Angle grinder with metal cutting disc ($0 if borrowed)
- High-temperature paint ($20)
Cut ventilation holes in the bottom third of the drum using the angle grinder. Sand and paint the exterior with heat-resistant paint. Place on a fireproof surface like concrete pavers.
Essential Tools You'll Need
Most DIY fire pit projects for beginners require these basic tools:
- Shovel and spade (for excavation)
- Level (critical for stable construction)
- Tape measure (precision prevents material waste)
- Work gloves (heat and cut protection)
- Safety glasses (mandatory when cutting materials)
Maintenance Tips for Longevity
Extend your fire pit's life with these professional maintenance techniques:
- Cover when not in use for 3+ days (prevents water accumulation)
- Remove ash after every 5-7 uses (prevents corrosive buildup)
- Inspect mortar joints annually for cracks
- Apply heat-resistant sealant to stone/brick pits every spring
- Store metal components indoors during winter months
Enhance Your Fire Experience
Elevate your backyard fire pit gathering with these thoughtful additions:
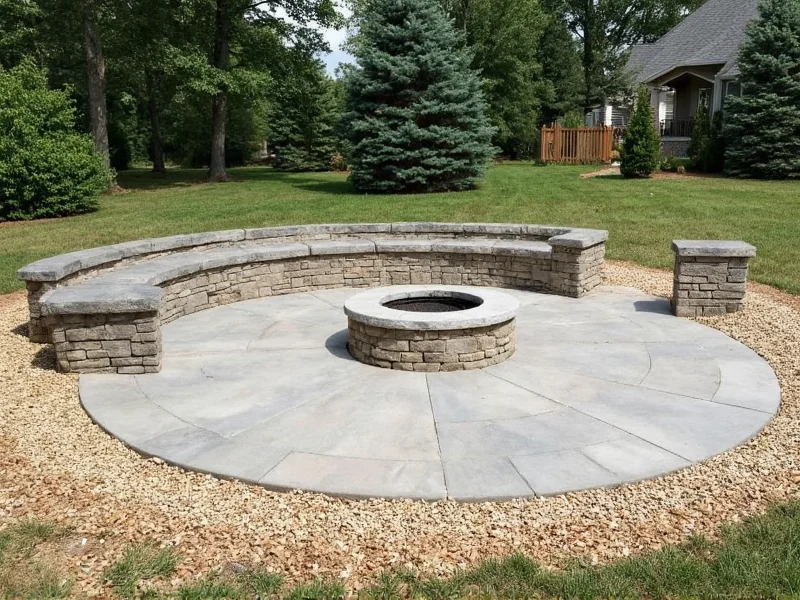
- Build curved seating walls using the same materials as your pit
- Add ambient lighting with solar-powered path lights
- Install a simple cooking grate for marshmallow roasting
- Create a firewood storage bench with hidden compartments
- Plant fire-resistant landscaping like lavender or stonecrop nearby
Frequently Asked Questions
How deep should I dig for an in-ground fire pit?
Dig 6-12 inches deep depending on your soil type. Sandy soils require deeper excavation (10-12 inches) while clay soils need only 6-8 inches. Always include a 2-3 inch gravel base for proper drainage to prevent water accumulation.
Can I use regular bricks for a fire pit?
No, standard bricks will crack under high heat. Use fire-rated bricks (refractory bricks) that withstand temperatures up to 1800°F. Alternatively, create a barrier using fire-rated mortar between standard bricks and the fire chamber to prevent direct heat exposure.
What's the ideal fire pit diameter for seating?
The optimal diameter is 36-44 inches for most residential uses. This size comfortably accommodates 4-6 people while maintaining proper heat distribution. Larger diameters (over 48 inches) require significantly more fuel and create uneven heating patterns.
How do I prevent weeds from growing under my fire pit?
Before installation, remove 4-6 inches of topsoil and replace with compacted gravel. Lay landscape fabric beneath the gravel layer, then add 1-2 inches of sand for leveling. This creates a weed-resistant base that also improves drainage.


 浙公网安备
33010002000092号
浙公网安备
33010002000092号 浙B2-20120091-4