
Make delicious homemade yogurt in just 4 simple steps: Heat milk to 180°F, cool to 110°F, add starter culture, and incubate for 6-12 hours. This foolproof method yields creamy, probiotic-rich yogurt with no additives—saving you money while giving you complete control over ingredients and texture.
The Beginner's Guide to Perfect Homemade Yogurt Every Time
Creating your own yogurt at home transforms basic milk into a nutrient-dense superfood through natural fermentation. Unlike store-bought varieties packed with thickeners and sweeteners, homemade yogurt delivers pure probiotics with customizable thickness and flavor. The entire process requires minimal equipment and just 20 minutes of active time before incubation—making it one of the most rewarding kitchen experiments you'll master.
Why Homemade Yogurt Beats Store-Bought
Key Advantages of DIY Yogurt
- Pure ingredients – No stabilizers, gums, or artificial sweeteners
- Cost savings – 50-70% cheaper per serving than premium brands
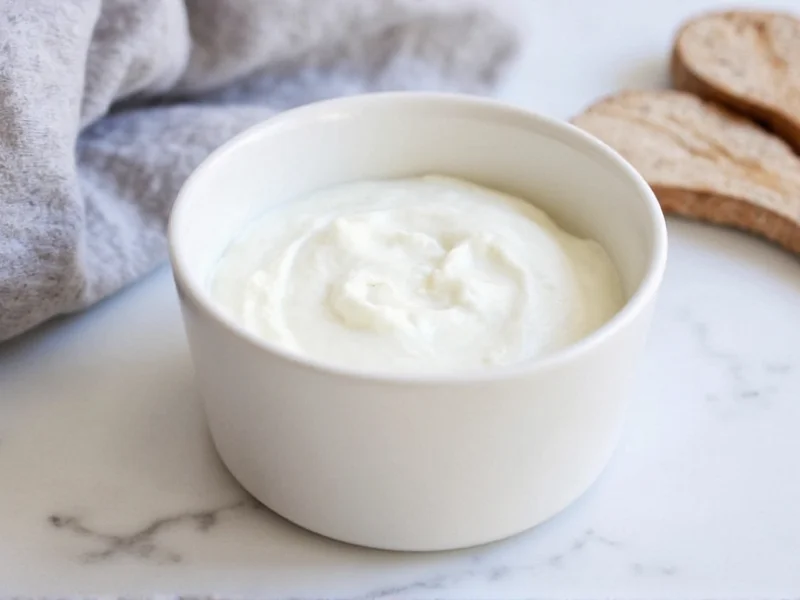
- Customizable texture – Control thickness from drinkable to Greek-style
- Live cultures – Higher probiotic count than heat-treated commercial products
- Sustainability – Eliminates single-use packaging waste
Essential Equipment Checklist
You likely already own most items needed for yogurt making. These five components form your yogurt-making toolkit:
| Item | Minimum Requirement | Budget Alternative |
|---|---|---|
| Heavy-bottomed pot | 2-quart stainless steel | Any non-reactive cooking pot |
| Thermometer | Digital probe (0.1° accuracy) | Candy thermometer |
| Incubation container | Yogurt maker | Cooler with warm water |
| Culture starter | Freeze-dried starter | Plain store-bought yogurt |
| Storage | Glass mason jars | Reusable food containers |
Step-by-Step Yogurt Making Process
1. Milk Preparation: The Critical Heating Phase
Heating serves two vital purposes: eliminating competing bacteria and denaturing milk proteins for creamier texture. Follow these precise temperature milestones:
- 161°F (72°C) – Pasteurization point (hold 15-20 seconds)
- 180°F (82°C) – Optimal protein denaturation (hold 5 minutes)
- 110°F (43°C) – Ideal inoculation temperature
Skim off any skin that forms during heating—this concentrates proteins for thicker results. Cooling time typically takes 30-45 minutes; speed it up by placing the pot in an ice bath while stirring gently.
2. Inoculation: Adding Your Starter Culture
Use 2 tablespoons of plain yogurt per quart of milk, or follow freeze-dried starter instructions. Key success factors:
- Mix starter thoroughly but gently to avoid disrupting milk structure
- Maintain temperature between 105-115°F during mixing
- Never use yogurt with added thickeners as starter
- For consistent results, reserve 2 tablespoons of your batch as next starter
3. Incubation: The Fermentation Sweet Spot
Temperature control during incubation determines texture and tanginess. This table shows how time and temperature affect results:
| Temperature | 6 Hours | 8 Hours | 12 Hours |
|---|---|---|---|
| 100°F (38°C) | Very mild, thin | Mild, drinkable | Medium tang, pourable |
| 110°F (43°C) | Mild, creamy | Classic tang, spoonable | Pronounced tang, thick |
| 115°F (46°C) | Noticeable tang | Sharp flavor, firm | Very tart, Greek-style |
Incubation beyond 12 hours risks separating whey and developing bitter notes. For Greek-style yogurt, strain after incubation using cheesecloth.
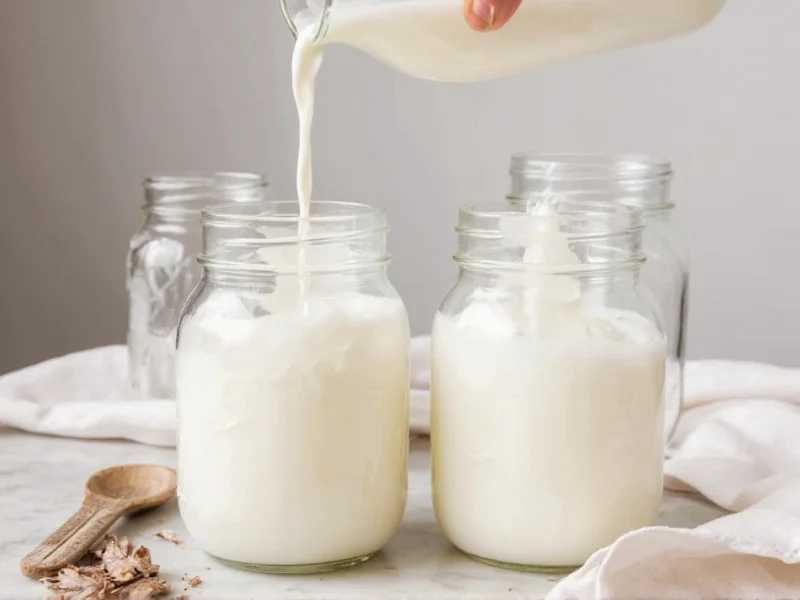
4. Chilling and Storage: Finalizing Your Batch
Refrigerate immediately after incubation to halt fermentation. During the 4-hour chilling period:
- Yogurt continues thickening as proteins set
- Flavor mellowing occurs (initial sharpness softens)
- Probiotic count stabilizes at peak levels
Store in airtight containers for up to 2 weeks. The longer it sits, the more pronounced the tang becomes—though probiotic viability remains high throughout storage.
Troubleshooting Common Yogurt Problems
Problem-Solution Reference Guide
Watery Consistency
Cause: Inconsistent incubation temperature or insufficient heating Solution: Heat milk to 180°F for full 5 minutes; maintain 110°F±2° during incubation
Grainy Texture
Cause: Overheating during initial pasteurization Solution: Use thermometer; never exceed 185°F; stir constantly while heating
Yogurt Didn't Set
Cause: Dead starter culture or temperature fluctuations Solution: Verify starter freshness; use digital thermometer; insulate incubation container
Yeast or Mold Growth
Cause: Contaminated equipment or starter Solution: Sterilize all tools; use fresh starter; maintain proper incubation temperature
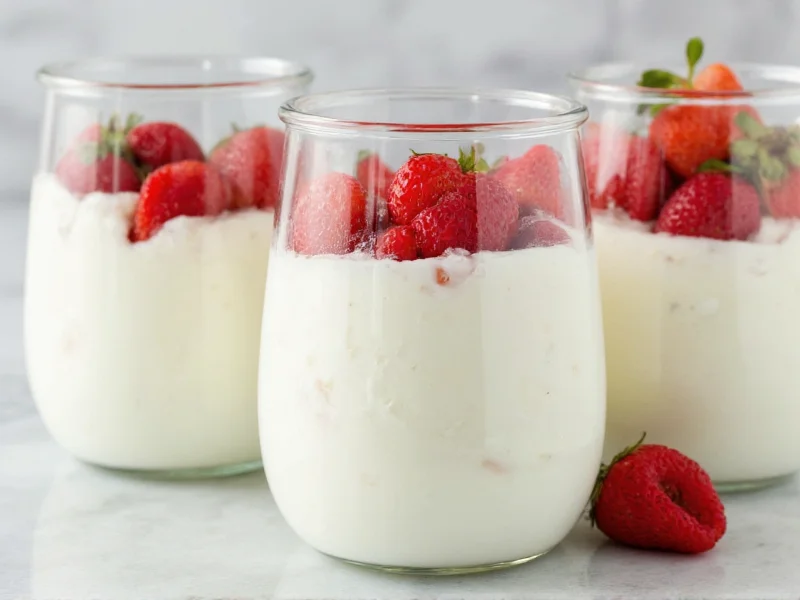
Flavor Variations and Creative Uses
Once you've mastered basic yogurt, experiment with these simple enhancements:
- Vanilla bean – Add scraped pod during heating (remove before inoculation)
- Honey swirl – Layer with local honey after chilling for probiotic benefits
- Labneh – Strain 48 hours for Middle Eastern cheese spread
- Freezer yogurt – Blend with fruit for healthy frozen treats

For dairy-free options, use full-fat coconut milk heated to 175°F with 1 tablespoon tapioca starch per can. Note that non-dairy versions typically require longer incubation (12-18 hours) due to different sugar composition.
Maximizing Probiotic Benefits
The health advantages of homemade yogurt stem from live cultures that survive refrigeration. To maximize benefits:
- Consume within 7 days for peak probiotic activity
- Avoid heating yogurt above 115°F when using in recipes
- Pair with prebiotic foods (bananas, oats, garlic) to feed beneficial bacteria
- Choose longer incubation (10-12 hours) for higher lactic acid bacteria count
Frequently Asked Questions
Can I use ultra-pasteurized milk for homemade yogurt?
Yes, but results may be thinner. Ultra-pasteurized milk has pre-denatured proteins that don't bind as effectively. Add 1/4 cup dry milk powder per quart to improve thickness while maintaining probiotic viability.
How do I know if my yogurt starter is still viable?
Check for these signs: 1) No mold or discoloration 2) Tangy aroma (not sour or yeasty) 3) Consistent texture without separation. If using store-bought starter, ensure it contains live cultures and hasn't passed its expiration date by more than 7 days.
Why does my homemade yogurt separate liquid whey?
Some whey separation is natural and indicates active fermentation. Excessive separation typically means over-incubation or temperature fluctuations. Simply stir whey back in for drinkable yogurt, or strain for thicker consistency. Avoid shaking containers during incubation to minimize separation.
Can I make yogurt without a thermometer?
While possible, results will be inconsistent. The wrist test (milk feels warm but not hot) approximates 110°F, but lacks precision. For reliable results, use an inexpensive digital thermometer—critical temperatures span just 5°F ranges where small variations dramatically affect texture and culture viability.
How long can I reuse my homemade yogurt as starter?
For optimal results, limit reuse to 3-4 generations. Each cycle introduces environmental bacteria that compete with starter cultures. After this point, flavor and texture consistency declines. Freeze-dried starters maintain culture purity for dozens of batches when stored properly.


 浙公网安备
33010002000092号
浙公网安备
33010002000092号 浙B2-20120091-4