

Why Homemade Rolls Beat Store-Bought Every Time
Forget dry, preservative-laden bakery rolls. Homemade versions deliver unmatched flavor and texture through three key advantages:
- Freshness on demand: Bake only what you need with zero chemical additives
- Cost savings: 12 perfect rolls for under $1.50 versus $5+ for commercial brands
- Customization: Adapt textures and flavors for any meal—from buttery dinner rolls to sweet cinnamon swirls
Your Essential Homemade Rolls Toolkit
Success starts with these non-negotiable ingredients and tools. Skip substitutions for your first batch—master the classic version before experimenting.
| Ingredient | Critical Role | Pro Tip |
|---|---|---|
| Bread flour (3½ cups) | Higher protein = better structure | Measure by weight: 440g for accuracy |
| Active dry yeast (2¼ tsp) | Guaranteed rise without fail | Test in warm water first—should foam in 5 mins |
| Unsalted butter (5 tbsp) | Richness without salt interference | Melt and cool to room temp |
Step-by-Step: Foolproof Homemade Rolls Method
This streamlined process eliminates common pitfalls. Total hands-on time: 20 minutes.
Phase 1: The Perfect Dough (15 mins)
- Activate yeast: Mix 1 cup warm water (110°F), 2¼ tsp yeast, and 1 tbsp sugar. Wait 5 minutes until foamy.
- Combine wet ingredients: Whisk in 5 tbsp melted butter and 1 large egg.
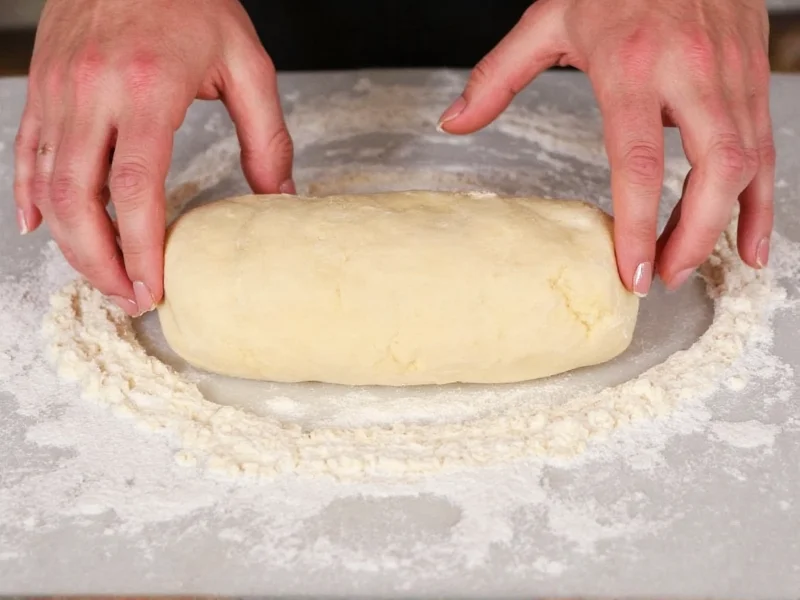
- Form dough: Gradually add 3½ cups bread flour and 1½ tsp salt. Knead 8 minutes until smooth and elastic.
Phase 2: Rising Secrets (45 mins)
Avoid dense rolls with these science-backed techniques:
- Temperature control: Place bowl in oven with light on (85°F ideal)
- Rise test: Press finger into dough—should spring back slowly
- Double-proofing: Punch down, rest 10 mins, then shape for better texture
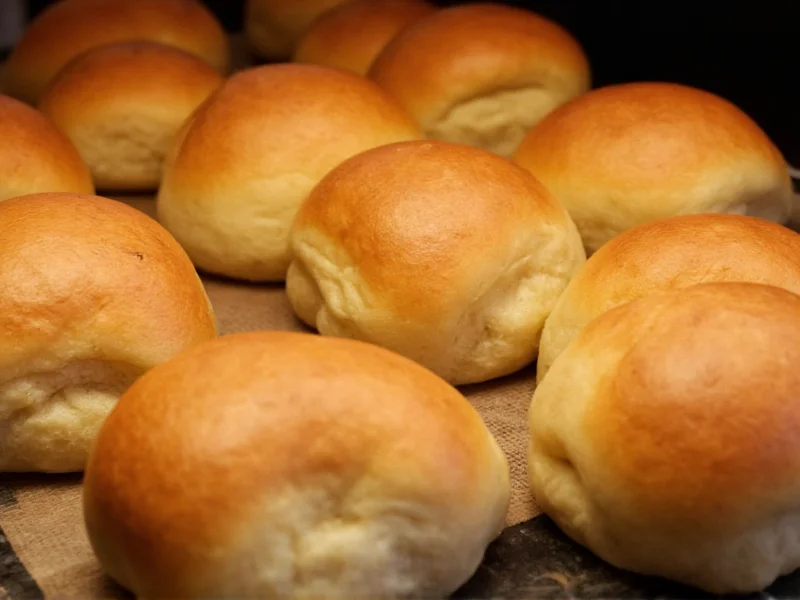
Phase 3: Baking Perfection (20 mins)
- Shape into 12 balls, place in greased 9x13 pan
- Second rise: 30 minutes until doubled
- Bake at 375°F: 18-20 minutes until golden brown
- Game-changer finish: Brush immediately with melted butter
Troubleshooting Your Homemade Rolls
Fix these common issues before they happen:
| Problem | Real Cause | Solution |
|---|---|---|
| Dense texture | Over-flouring during kneading | Add water 1 tsp at a time if sticky |
| Pale tops | Oven temperature too low | Use oven thermometer for accuracy |
| Tunneling inside | Under-proofed before baking | Wait until rolls touch in pan |
3 Creative Homemade Rolls Variations
Once you've mastered the base recipe, try these chef-inspired twists:
- Garlic-Herb Rolls: Fold in 2 tbsp minced parsley + 1 tsp garlic powder before shaping
- Cheese-Stuffed Rolls: Wrap 1 tsp sharp cheddar in each dough ball
- Cinnamon Swirl Rolls: Roll dough with cinnamon-sugar butter, slice, and twist

Storage & Reheating Guide
Enjoy fresh-baked quality for days:
- Room temp: Store in airtight container 2 days (never refrigerate!)
- Freezing: Wrap cooled rolls in foil, freeze 3 months
- Reviving: Spritz with water, warm 5 mins at 300°F for fresh-from-oven texture
Master the Art of Homemade Rolls
With this precise method, you'll consistently create bakery-quality rolls that impress. The secret lies in respecting yeast's biological needs—proper temperature, hydration, and proofing time. Start with the classic recipe this weekend, then experiment with flavors. Nothing compares to the aroma of truly homemade rolls fresh from your oven.
Frequently Asked Questions
How can I tell when homemade rolls are fully baked?
Check internal temperature with a thermometer—200°F indicates perfect doneness. The bottoms should sound hollow when tapped, and rolls should pull cleanly from the pan.
Can I make homemade rolls without a stand mixer?
Absolutely. This recipe is designed for hand-kneading. Mix with a wooden spoon until shaggy, then knead on floured surface 8-10 minutes until smooth and passes the windowpane test.
Why did my homemade rolls collapse after baking?
Over-proofing is the culprit. When dough rises more than double, the gluten structure weakens. Always perform the finger test: gently press dough—if indentation remains, it's ready; if it springs back fast, it needs more time.
How do I adapt this for high-altitude baking?
Above 3,500 feet, reduce yeast by 25% and sugar by 1 tbsp. Increase liquid by 2-4 tbsp to compensate for dry air. Shorten rising times by 20-30% since dough rises faster at elevation.


 浙公网安备
33010002000092号
浙公网安备
33010002000092号 浙B2-20120091-4