
Why DIY Mirror Framing Beats Professional Services
Professional mirror framing costs $150-$400 on average, but DIY takes just 3-4 hours and costs 70% less. You gain complete control over materials and design while avoiding common pitfalls like ill-fitting frames or mismatched styles. Most homeowners save $100+ even when using premium reclaimed wood.
Top 3 Benefits of DIY Mirror Framing
- Cost control: Spend $20-$50 instead of $200+ for identical results
- Design freedom: Match frames to existing furniture using your exact stain or paint
- Eco-friendly option: Repurpose pallet wood or scrap lumber (reduces waste by 30%)
Essential Pre-Project Planning
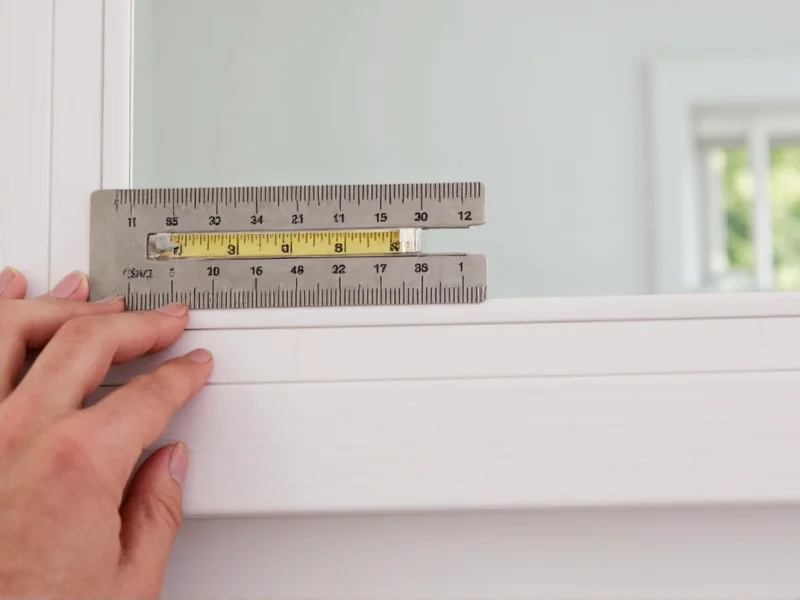
Skipping measurements causes 80% of DIY framing failures. Follow this precise workflow:
- Measure mirror edges: Use a metal ruler (not tape measure) for exact dimensions. Record width/height to 1/16"
- Calculate frame width: Add 1.5x mirror thickness to each side (e.g., 1/4" mirror needs 3/8" frame overhang)
- Check wall space: Ensure framed mirror leaves 6" clearance around edges for safe mounting
| Material Type | Cost per 8ft Board | Best For | Beginner Rating |
|---|---|---|---|
| Pine (1x2) | $3.50 | Painted modern frames | ★★★★★ |
| Reclaimed barn wood | $8.00 (free sources) | Rustic farmhouse style | ★★★☆☆ |
| MDF molding | $5.25 | Ornate traditional frames | ★★☆☆☆ |
Step-by-Step Framing Process
Complete this project with just 5 tools: miter saw, wood glue, clamps, sandpaper, and finish nails. Here's the professional workflow:
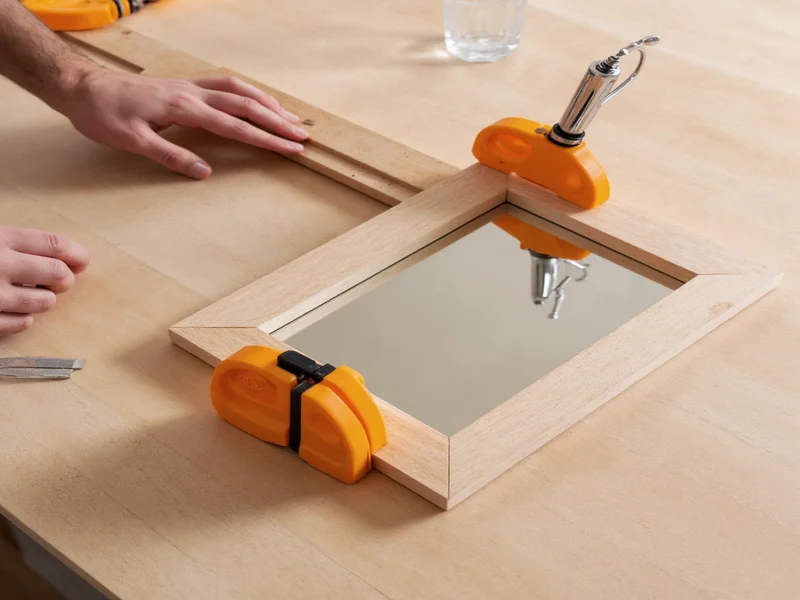
Phase 1: Frame Construction (45 minutes)
- Cut four pieces at 45-degree angles using miter saw (two pieces = mirror width + frame width x2)
- Apply wood glue to mitered edges before clamping
- Reinforce corners with 1" finish nails driven at 45-degree angles
- Wipe excess glue immediately with damp cloth
Phase 2: Mirror Mounting (20 minutes)
Avoid the #1 mistake: gluing directly to mirror surface. Instead:
- Line frame interior with 1/8" foam weatherstripping
- Place mirror on frame face-down on soft surface
- Secure with mirror clips (not glue) at top/bottom corners
- Test stability by lifting frame 6" off surface
Phase 3: Finishing Touches (1 hour drying time)
- Sand frame with 120-grit paper, then 220-grit
- Wipe with tack cloth to remove dust
- Apply two thin coats of water-based polyurethane (dries clear)
- Wait 24 hours before hanging to prevent adhesive failure
Avoid These 3 Costly Mistakes
Mistake #1: Skipping Wood Acclimation
Wood expands/contracts with humidity. Leave cut pieces indoors for 48 hours before assembly to prevent gaps.
Mistake #2: Using Standard Nails
Finish nails prevent splitting. Standard nails cause cracks that show through paint.
Mistake #3: Rushing the Finish
Skipping sanding between coats creates visible texture. Always sand lightly with 320-grit between polyurethane layers.
Customization Ideas for Unique Results
Elevate basic frames with these professional techniques:
- Reclaimed wood accent: Add 1/4" strip of salvaged barn wood to frame front for rustic texture
- Two-tone finish: Paint frame interior black, stain exterior walnut for modern contrast
- Integrated lighting: Route small groove for LED strip behind frame (requires router)

FAQ: DIY Mirror Framing Essentials
Can I frame a mirror without power tools?
Yes. Use pre-cut molding from craft stores and assemble with wood glue and hand clamps. Sand with sanding blocks instead of power sanders. This adds 1-2 hours but costs under $25.
How do I prevent mirror fogging inside the frame?
Leave 1/8" ventilation gap at bottom corners by not sealing those sections with weatherstripping. This allows moisture escape while maintaining stability. Never fully enclose the mirror perimeter.
What's the safest way to handle large mirrors?
Always work with a partner. Place mirror face-down on moving blanket, not directly on floor. Wear cut-resistant gloves and keep fingers clear of edges. For mirrors over 24", use temporary cardboard corners taped to edges during assembly.
Can I frame an existing wall-mounted mirror?
Yes, but remove it first. Measure frame dimensions while mirror is flat on ground. Reinstall using heavy-duty mirror hangers rated for 2x the total weight (mirror + frame + hardware).


 浙公网安备
33010002000092号
浙公网安备
33010002000092号 浙B2-20120091-4