

Create beautiful wooden craft letters that transform any space with personalized charm. This comprehensive guide reveals professional techniques for selecting the right wood types, essential tools for clean cuts, and finishing methods that prevent warping—plus 7 creative display ideas you won't find elsewhere. Whether you're a beginner or experienced crafter, you'll discover sustainable approaches using reclaimed materials and time-saving hacks that make each project achievable in under 3 hours.
Why Wooden Craft Letters Deserve a Place in Your Creative Toolkit
Wooden craft letters offer unmatched versatility for personalized decor, combining natural warmth with custom expression. Unlike mass-produced alternatives, handmade wooden letters carry unique character through wood grain variations and artisanal finishes. The growing popularity of DIY wooden name signs stems from their ability to transform ordinary spaces into meaningful environments—perfect for nurseries, weddings, or business branding.
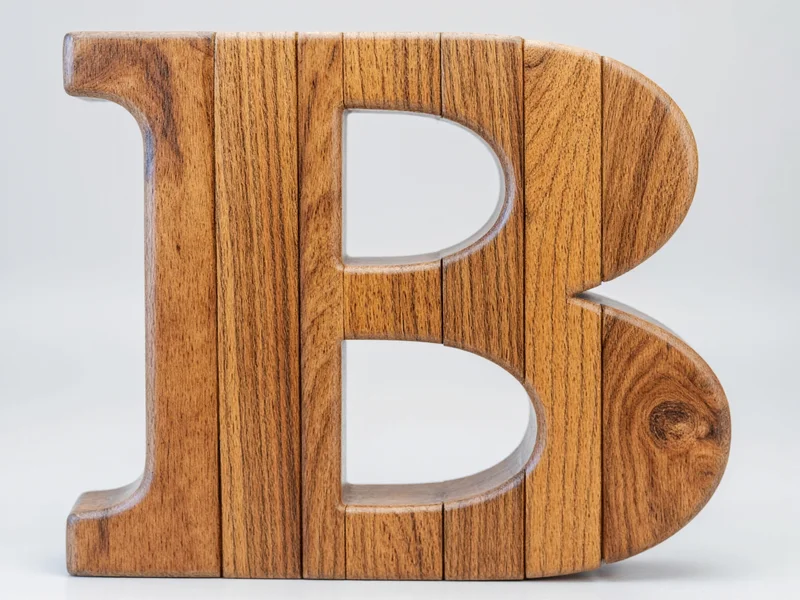
What sets quality wooden alphabet letters apart? Professional woodworkers prioritize three elements: wood stability (to prevent warping), clean edge definition, and surface readiness for finishing. Basswood consistently ranks as the best wood for craft letters due to its fine grain, minimal splintering, and excellent paint adhesion—making it ideal for beginners tackling their first wooden craft letters for home decor project.
Essential Materials & Tools Checklist
Starting with proper materials prevents common frustrations. This curated selection balances quality and accessibility for beginner woodworking letter projects:
| Material/Tool | Beginner Recommendation | Pro Upgrade | Cost-Saving Alternative |
|---|---|---|---|
| Wood Type | Basswood (1/4"-1/2") | Reclaimed hardwood | Repurposed pallet wood |
| Cutting Tool | Scroll saw | Laser cutter | Hand coping saw |
| Sanding | Orbital sander (120-220 grit) | Random orbit sander | Sandpaper blocks |
| Finish | Water-based polyurethane | Tung oil | Beeswax polish |
Step-by-Step Creation Process
Follow this refined workflow used by professional woodworkers to create gallery-quality custom wooden name signs:
Design Phase (15-30 minutes)
- Use free vector software like Inkscape to create letter templates
- Maintain minimum 1/2" stroke width for structural integrity
- Add 1/8" registration marks for precise alignment during assembly
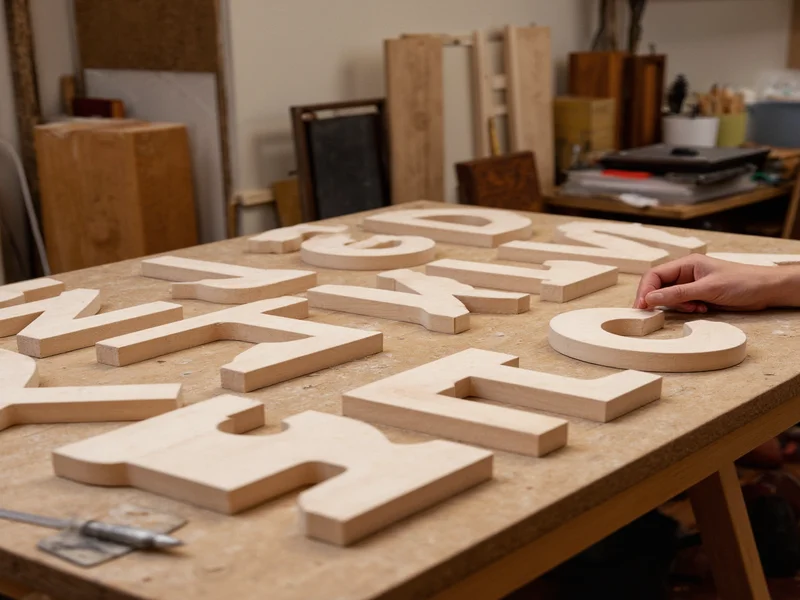
Cutting Techniques That Prevent Splintering
Wood grain direction significantly impacts cut quality. Always cut with the grain when possible, and employ these methods:
Beginner-Friendly Cutting Method
Apply painter's tape along cutting lines to minimize tear-out. Start cuts slowly, maintaining consistent pressure. For inside curves, drill starter holes before inserting saw blade.
Finishing Secrets Professionals Use
The difference between amateur and professional results often lies in finishing. After sanding through progressively finer grits (120 → 150 → 220):
- Wipe surface with tack cloth to remove dust
- Apply wood conditioner for even stain absorption
- Use foam brushes for smooth polyurethane application
- Lightly sand between coats with 320-grit paper
Creative Display Ideas Beyond Basic Wall Mounting
Move beyond standard picture hanging with these innovative approaches to showcase your personalized wooden letter decor:
The Floating Shelf Technique
Create visual interest by mounting letters on varying depth shelves. Use hidden brackets to make letters appear suspended in mid-air. This works especially well for monogram displays in entryways.
Seasonal Rotation System
Build a modular display using a wooden backing board with strategically placed holes. Insert dowels to support different letter configurations for holidays and seasons—no repainting required.
Integrated Lighting
For dramatic effect, route small channels in the back of letters to accommodate LED strip lighting. This wooden craft letters technique creates beautiful shadow effects, perfect for business signage or bedroom accents.
Sustainable Crafting Practices
As a woodworker committed to environmental responsibility, I prioritize these sustainable wooden craft letters methods:
- Source wood from certified reclaimed lumber yards
- Use water-based finishes with low VOC content
- Repurpose sawdust for wood filler or garden paths
- Create modular designs that allow letter reuse for different words
Reclaimed wood not only reduces environmental impact but adds unique character through natural patina and historical grain patterns. Many urban wood cooperatives now offer properly dried, milled reclaimed wood specifically for wooden alphabet letters DIY projects.
Troubleshooting Common Challenges
Even experienced crafters encounter these issues—here's how to solve them:
Warping Prevention
Wood movement causes most failures in wooden craft letters. Always seal all surfaces equally with finish, and avoid extreme thickness variations within single letters. For larger pieces, incorporate hidden aluminum stiffeners in the back.
Paint Bleed Solutions
When painting detailed lettering, use a slightly damp brush with minimal paint. Apply thin coats rather than heavy applications. For crisp edges, try vinyl letter masking instead of painter's tape.
Advanced Techniques for Experienced Crafters
Elevate your custom wooden name signs with these professional methods:
3D Layering
Create depth by stacking multiple letter cutouts with spacers between layers. Vary wood types or stains for dramatic contrast. This technique transforms simple letters into sculptural art pieces.
Mixed Media Integration
Incorporate complementary materials like leather straps, metal inlays, or embedded resin elements. For wedding signs, consider adding delicate floral motifs using wood burning techniques.
Frequently Asked Questions
What's the most cost-effective wood for beginner wooden craft letter projects?
Basswood offers the best balance of affordability, workability, and professional results for beginners. At $15-$25 per 1/4" thick 12"x24" sheet, it provides enough material for multiple letter projects. Its fine grain prevents splintering during cutting, and it accepts paint beautifully without requiring wood conditioner—unlike pine which often shows blotchy results.
How can I prevent wooden letters from warping over time?
Complete surface sealing is critical—apply finish to all edges and surfaces equally. For letters larger than 12", incorporate a hidden aluminum stiffener rod routed into the back. Always allow wood to acclimate in your workspace for 48 hours before cutting, and avoid extreme thickness variations within single letters. Properly dried reclaimed wood often demonstrates better stability than new lumber.
What's the safest cutting method for detailed wooden craft letters without power tools?
A coping saw with fine-toothed blades (15-20 TPI) provides the most control for intricate letter details. Clamp your wood securely and use a slow, steady motion. Apply painter's tape along cutting lines to minimize tear-out. For inside cuts, drill starter holes first. Always cut slightly outside your marked lines, then refine edges with sanding blocks. This hand-cutting approach yields professional results while eliminating power tool risks for beginners.
How do I create consistent spacing when arranging multiple wooden craft letters?
Create a spacing jig using a scrap wood strip with notches cut at consistent intervals matching your desired letter spacing. Alternatively, use a digital template projected onto your mounting surface as a guide. For wall installations, make a cardboard template first to test spacing before final mounting. Professional sign makers often use the 'eye centering' technique—placing visual center slightly higher than mathematical center for more pleasing results.


 浙公网安备
33010002000092号
浙公网安备
33010002000092号 浙B2-20120091-4