

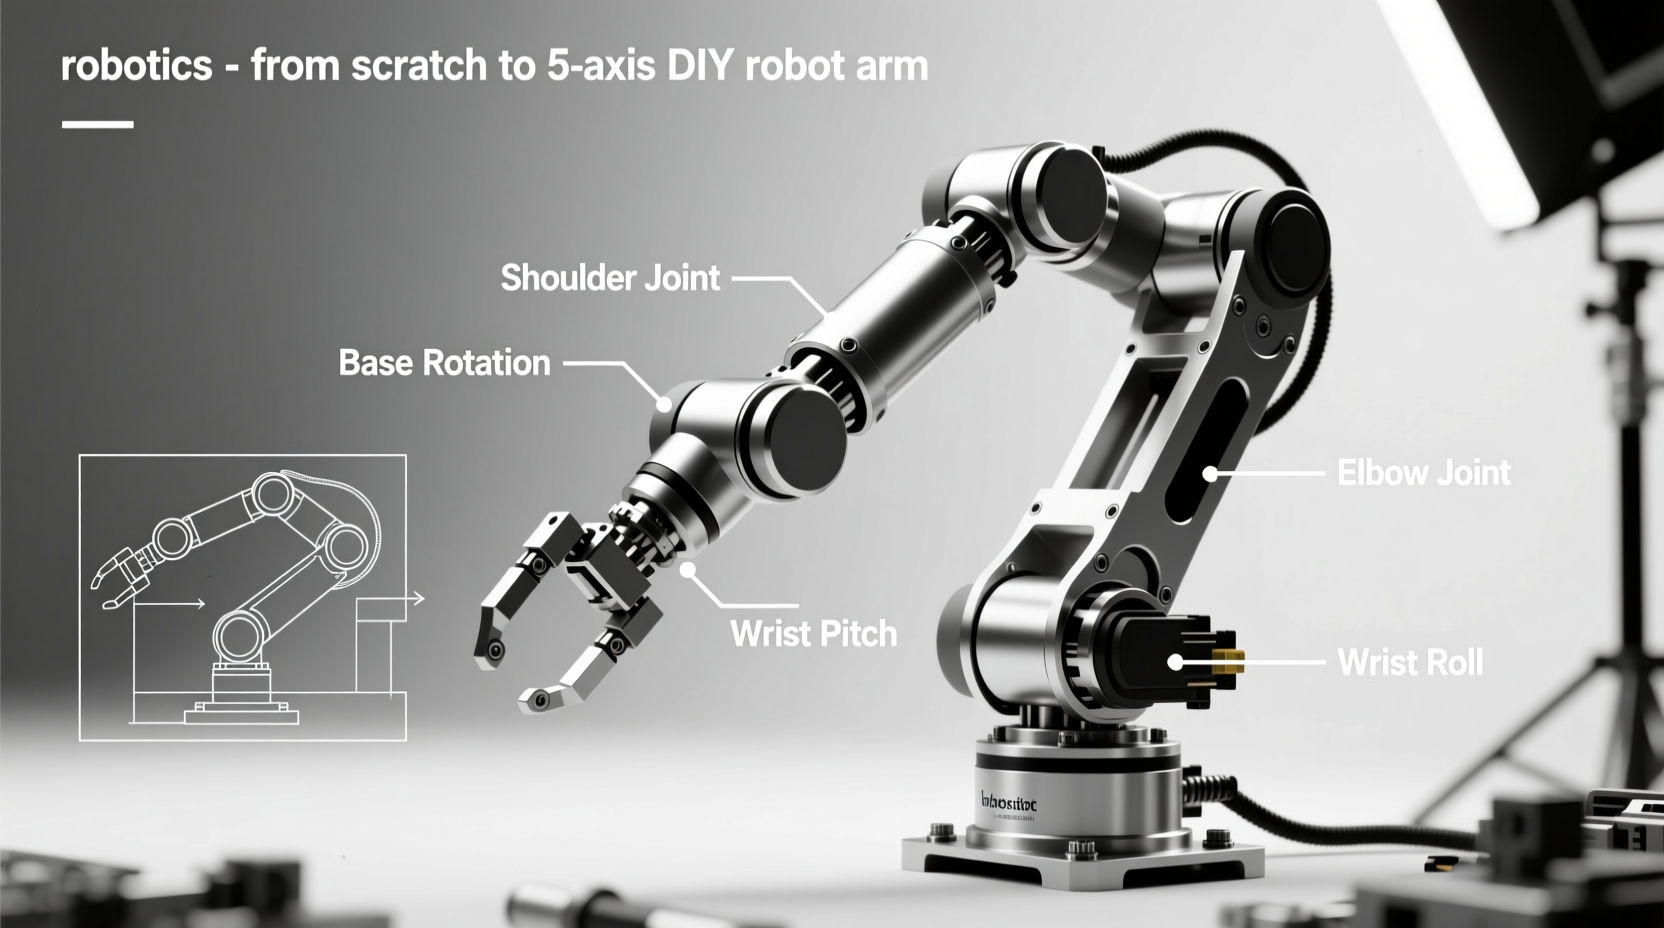
Understanding 5-Axis Robot Arm Configurations
For DIY robotics, articulated arms dominate due to their versatile workspace and obstacle navigation capabilities. Unlike Cartesian or SCARA designs, articulated configurations mimic human arm movement, enabling access to confined spaces—critical for home workshops. Based on ThinkRobotics' industry analysis, here's how common types compare:
| Arm Type | DIY Suitability | Best For | Limitations |
|---|---|---|---|
| Articulated (5-6 axis) | ★★★★★ | Reaching around obstacles, 3D workspace tasks | Complex calibration; requires precise gear ratios |
| SCARA | ★★★☆☆ | High-speed pick-and-place on flat surfaces | Limited vertical reach; unsuitable for overhead tasks |
| Cartesian | ★★☆☆☆ | Precision CNC-like tasks (e.g., 3D printing) | Bulky frame; inefficient workspace utilization |
Component Selection: Quality vs. Cost Tradeoffs
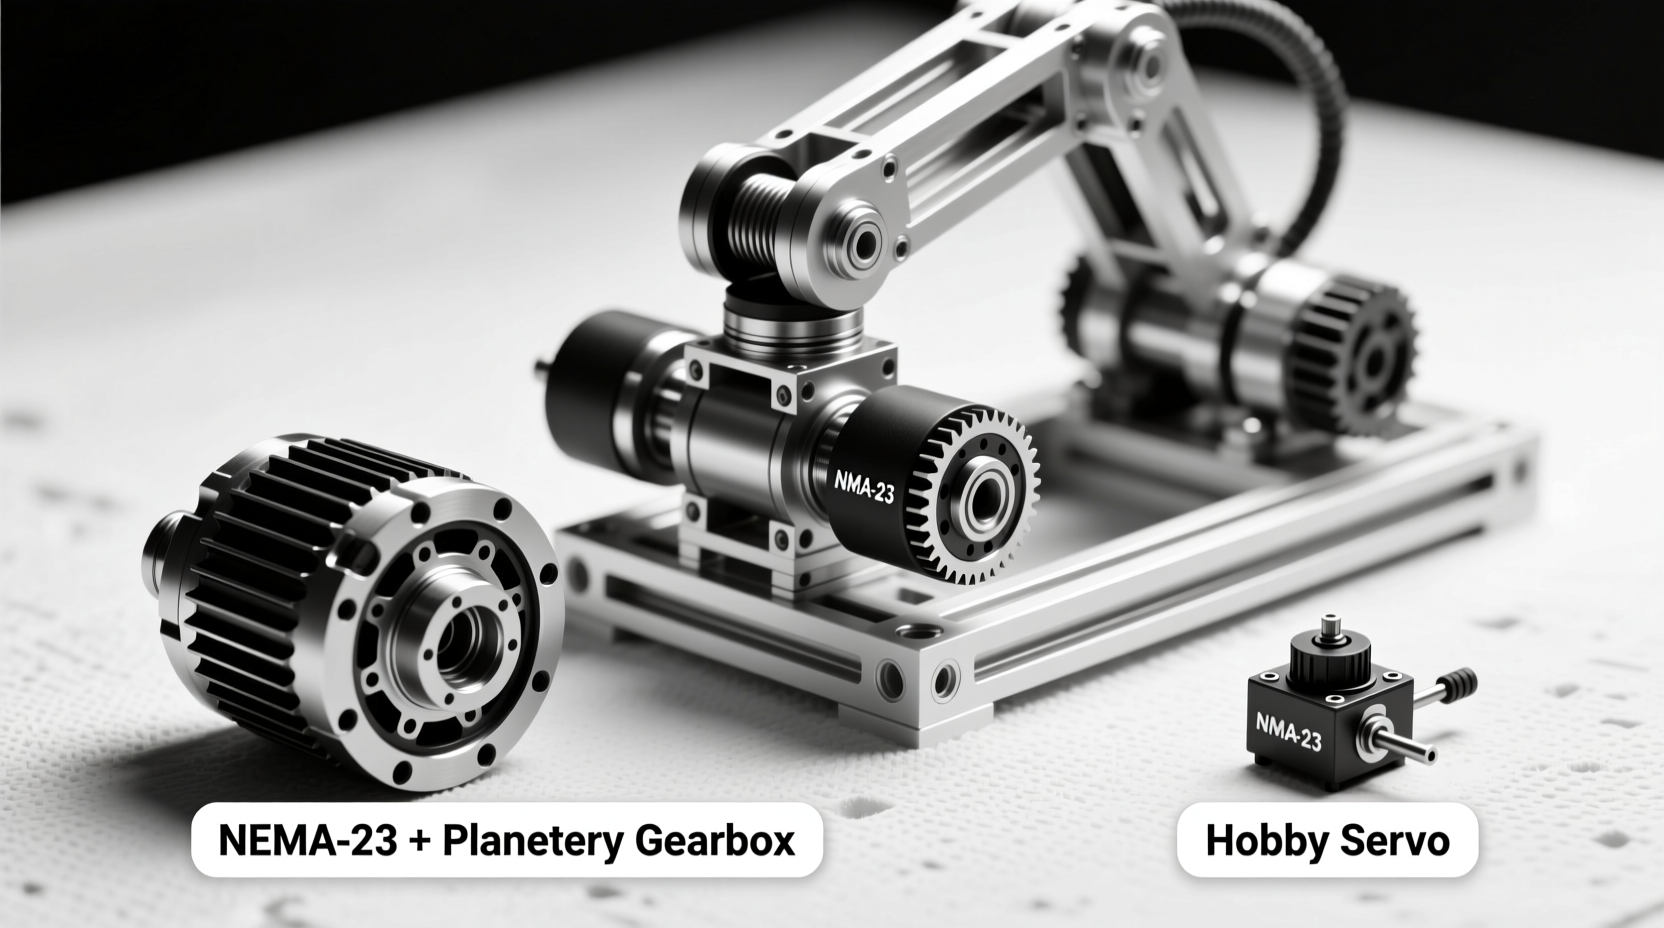
Selecting reliable components prevents 70% of common DIY failures. Stepper motors must match torque requirements—undersized NEMA-17 units fail under 1.5kg loads, while over-spec'd NEMA-23 motors waste budget. Always verify gear ratios: as RobotWorx's engineering data confirms, a 27:1 ratio for the wrist axis ensures precision in delicate tasks. Avoid these market traps:
- "Universal" servo kits: Cheap 9g servos (like those in Progressive Automations' basic guide) lack torque for 5-axis payloads—opt for 20kg-cm metal-geared alternatives.
- Unverified 3D prints: Warped PLA parts cause alignment errors. Use PETG with 20% infill and validate dimensions against AR4's industrial tolerances.
When to Build (and Avoid) a DIY 5-Axis Arm
Build when: You need customizable workspace access for prototyping (e.g., circuit board assembly) or educational purposes. A well-constructed DIY arm handles ≤3kg payloads for non-critical tasks, saving 60-80% versus commercial units.
Avoid when: Precision demands exceed ±0.5mm (e.g., medical device assembly) or payloads exceed 3kg. Industrial arms like the AR4 use hardened steel gears unavailable in DIY kits—attempting heavy lifts risks gear stripping, as documented in RobotWorx's load tests.
Step-by-Step Assembly Framework
Follow this verified sequence to minimize errors:
- Frame construction: Use 2020 aluminum extrusions for rigidity. Cut parts to exact dimensions—0.5mm errors cascade into joint misalignment.
- Motor installation: Mount NEMA-17 on axes 1, 3, and 4 (15:1, 9:1, 27:1 ratios); dual NEMA-23 on axis 2 (10:1 planetary gearbox) per E.R.A. specifications.
- Controller setup: Program Teensy 4.1 (Arduino-compatible) using open-source libraries like ROS Kinetic. Calibrate step counts before adding end effectors.
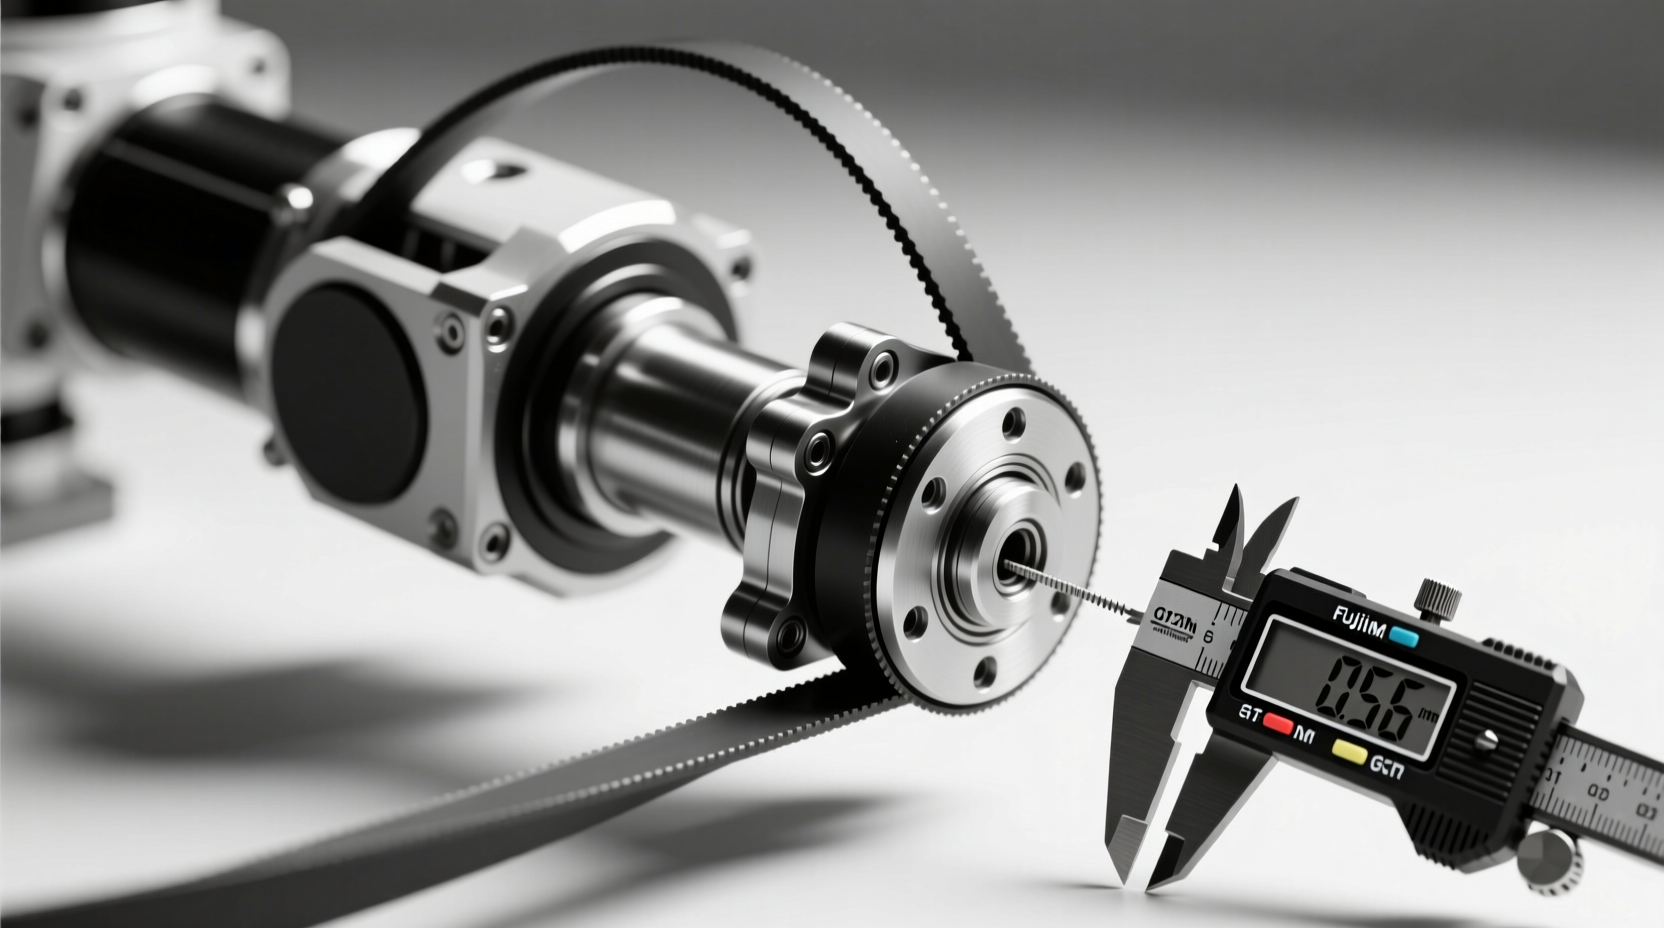
- GT2 pulley alignment: Ensure 0.1mm belt tension—excessive slack causes dead zones during direction changes.
Avoiding Critical Build Mistakes
New builders often overlook three pitfalls:
- Ignoring inertia calculations: Unbalanced arms vibrate at high speeds. Calculate moment of inertia for each segment using AR4's torque formulas.
- Skipping dead zone testing: Test all axes at 10° increments—GT2 pulleys require 2-3° dead zone compensation in code.
- Using underpowered PSUs: Stepper motors draw 2.5A each; a 12V/10A supply prevents voltage sag during multi-axis movement.
Everything You Need to Know
A basic 5-axis arm costs $300-$500 using NEMA-17 motors, aluminum frames, and a Teensy 4.1 controller. Budget $700+ for 3kg payload capacity with dual NEMA-23 motors on the shoulder axis, as validated by RobotWorx's industrial-grade build. Avoid sub-$200 kits—they typically lack precision for multi-axis coordination.
Arduino Uno lacks sufficient PWM pins and processing speed for smooth 5-axis control. Use Arduino-compatible boards like Teensy 4.1 (as in AR4 arms) with 32-bit processors. Uno works only for simplified 3-axis arms with reduced speed, risking motor stuttering during complex movements.
Use metal inserts for motor mounts and print with PETG at 60°C bed temperature to minimize warping. Validate part dimensions against Progressive Automations' tolerance guidelines—0.2mm gaps cause cumulative wobble. For critical joints, replace prints with machined aluminum brackets.
Most DIY 5-axis arms achieve 1.5-3kg payloads. Exceeding 3kg risks gear stripping, as RobotWorx's load tests show NEMA-23 motors failing at 3.2kg. For heavier tasks, reinforce axis 2 with dual motors and 10:1 planetary gearboxes—never modify consumer-grade kits beyond specifications.
Expect 80-120 hours for first-time builders: 30 hours for frame assembly, 40 for motor/wiring, 30 for calibration, and 20 for troubleshooting. AR4 project logs confirm that skipping dead zone testing adds 15+ hours in rework. Use pre-cut kits to reduce time by 30%.


 浙公网安备
33010002000092号
浙公网安备
33010002000092号 浙B2-20120091-4