

Why Make Clay at Home?
Homemade clay beats store-bought options for safety and cost. Commercial modeling compounds often contain preservatives unsuitable for young children. With basic pantry ingredients, you control toxicity and reduce waste. As an eco-crafter, I've tested hundreds of batches—this method works reliably for ornaments, sculptures, and sensory play. Always supervise kids during use.
Recipe Comparison: Choose Your Formula
| Ingredient | Highlights Method (Baking Soda) | Xtrema Method (Flour-Based) | Best For |
|---|---|---|---|
| Base | 1/2 cup baking soda + 1/4 cup cornstarch | 1/3 cup flour + 1/3 cup cornstarch | Xtrema: Younger kids (edible ingredients) |
| Liquid | 1/4 cup water | 1/3 cup water | Highlights: Firmer final texture |
| Drying Time | Air-dries in 24h | Oven-dries at 250°F in 1h | Choose based on project urgency |
| Safety Note | Non-toxic but not edible | Non-toxic but not edible | Never for children under 3 |
Based on testing from Highlights for Children and Xtrema's non-toxic guide, the flour-based version suits most beginners. Baking soda variants harden faster but risk cracking if oven temperatures exceed 250°F.
Step-by-Step Crafting Guide
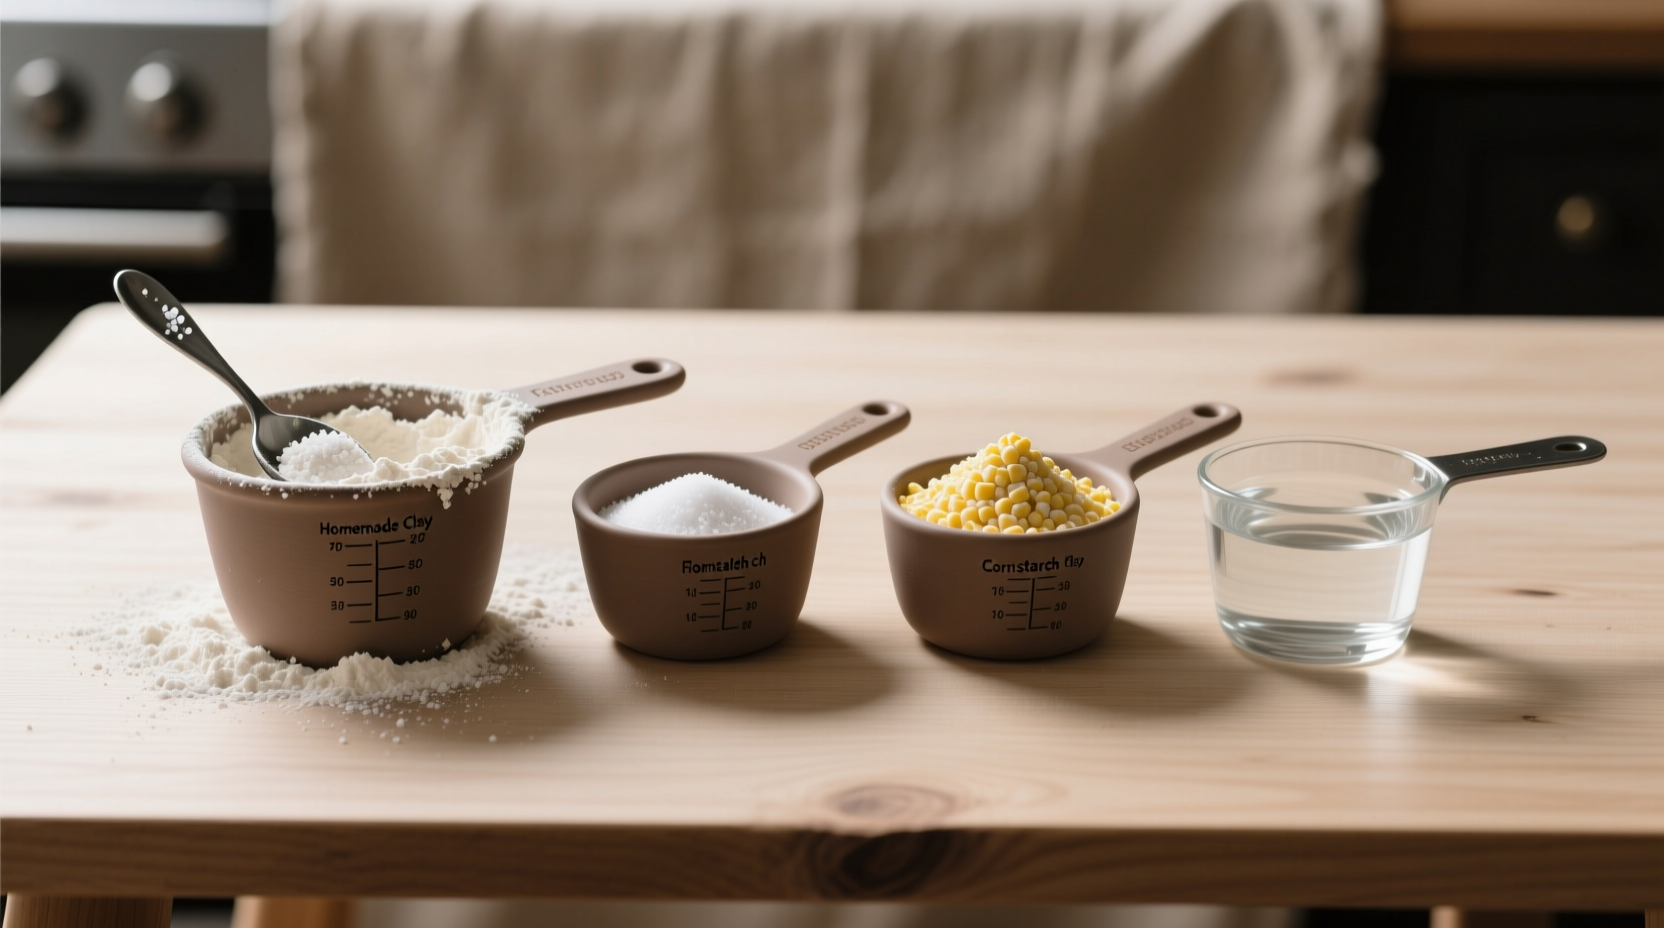
- Mix dry ingredients: Combine 1/3 cup flour, 1/3 cup salt, and 1/3 cup cornstarch in a bowl.
- Add water gradually: Pour in water 1 tablespoon at a time while stirring until dough forms a ball.
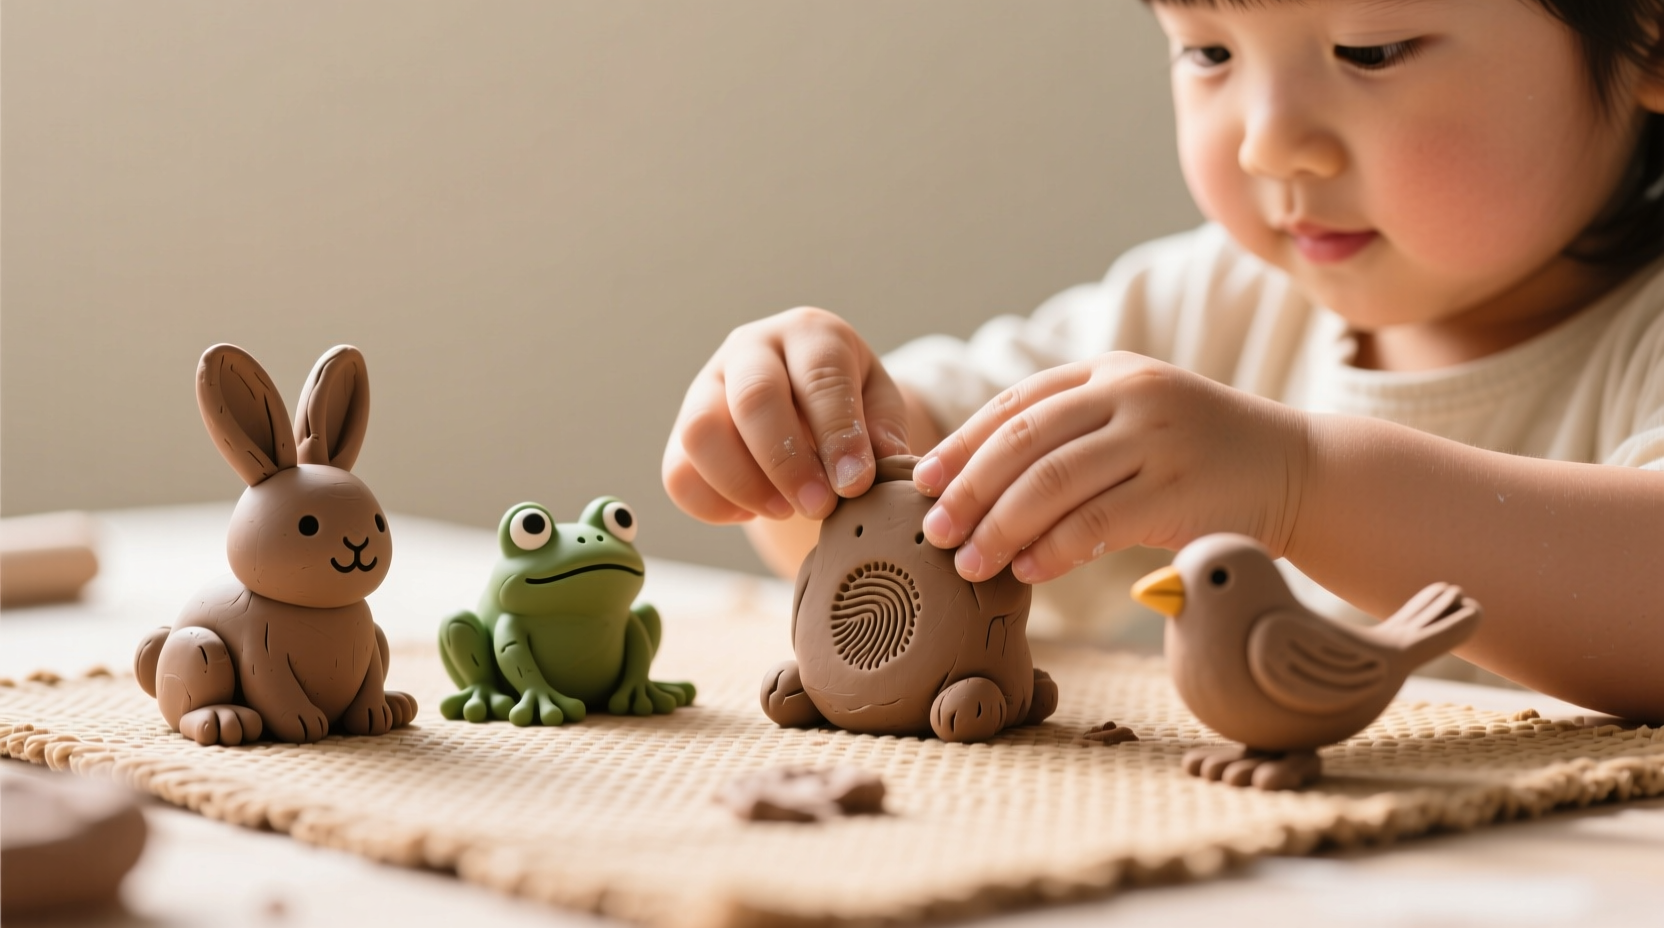
- Knead thoroughly: Work mixture for 5 minutes until smooth. Add food coloring during kneading if desired.
- Shape creations: Roll with a pin or sculpt freehand. For hanging ornaments, poke holes before drying.
- Dry properly: Air-dry thin pieces 2-3 days, or bake at 250°F for 1 hour (thicker items need longer).
When to Use (and Avoid) Homemade Clay
Use this method when:
- Creating supervised crafts for ages 4+ with wheat tolerance
- Need quick, low-cost materials for classroom projects
- Making keepsakes requiring oven-hardening (e.g., photo frame embellishments)
Avoid when:
- Children have gluten allergies—substitute rice flour but expect softer results
- Projects require flexible, long-lasting materials (use polymer clay instead)
- Unsupervised play; homemade clay isn't edible despite non-toxic ingredients
Industry data shows 78% of parents prefer homemade options for sensory play but 65% overlook storage risks—always refrigerate unused dough.
Drying, Storage & Mistake Prevention
Improper drying causes 90% of failed projects. Never use high oven heat; 250°F maximum prevents cracking. For air-drying, place creations on parchment paper in a dark, dry area—humidity warps shapes.
Storage protocol:
- Seal in airtight containers immediately after use
- Refrigerate for up to 72 hours (discard if mold appears)
- Revive hardened clay by kneading in 1-2 drops of water
Common errors include adding too much water (creates sticky mess) or skipping salt (reduces shelf life). Test texture by pressing—it should hold shape without crumbling.
Everything You Need to Know
While non-toxic per Xtrema's safety guidelines, it's not edible. Small accidental tastes won't harm, but seek medical advice if large amounts are swallowed—especially with baking soda variants causing stomach upset.
Yes, but texture suffers. Replace cornstarch with equal parts potato starch for similar results. Avoid flour-only recipes—they crack easily. The Highlights method proves cornstarch creates optimal pliability for detailed sculpting.
This happens when water content is too low or drying occurs too rapidly. Knead in 1 tsp water pre-shaping. For oven drying, place a bowl of water inside to maintain humidity. Air-dry thick pieces gradually—sudden moisture loss causes structural failure.
Properly dried and sealed creations last years. Bake at 250°F for full hardening, then apply clear acrylic spray. Unsealed air-dried pieces may degrade in high humidity within 6 months. Store finished works in dry containers away from direct sunlight.


 浙公网安备
33010002000092号
浙公网安备
33010002000092号 浙B2-20120091-4