

Why DIY Rustic Farmhouse Bathrooms Work for Modern Homes
Today's rustic farmhouse bathroom trend blends vintage charm with practical functionality. Unlike mass-produced designs, DIY versions offer personalized character while solving real homeowner pain points: moisture damage and budget constraints. Our approach prioritizes water-resistant materials from the start—critical for bathroom longevity. Forget Pinterest fails; these projects use proven techniques from reclaimed wood workshops that withstand humidity.
Planning Your Rustic Bathroom Transformation
Before hammering a single nail, address these often-missed fundamentals:
Moisture Mapping Checklist
- Identify splash zones (within 36" of sinks/showers)
- Test existing ventilation (aim for 50+ CFM fans)
- Check subfloor integrity with moisture meter (max 12% reading)
- Plan electrical upgrades for vintage-style lighting
Skipping moisture assessment causes 68% of DIY bathroom failures according to Remodeling Magazine's 2024 survey. Always seal wood surfaces with marine-grade polyurethane—not basic varnish—before installation.
Essential Materials & Budget Breakdown
Smart sourcing separates successful projects from costly mistakes. Focus on these moisture-resistant materials:
| Material | DIY Cost | Pro Alternative Cost | Critical Tip |
|---|---|---|---|
| Reclaimed barn wood | $0-$25 | $120+ | Soak in borax solution for 48hrs to kill pests |
| Galvanized pipe fittings | $18 | $75 | Use pipe dope sealant on all threads |
| Thrifted apothecary jars | $5-$10 | $40+ | Replace rubber gaskets with silicone |
Step-by-Step DIY Projects
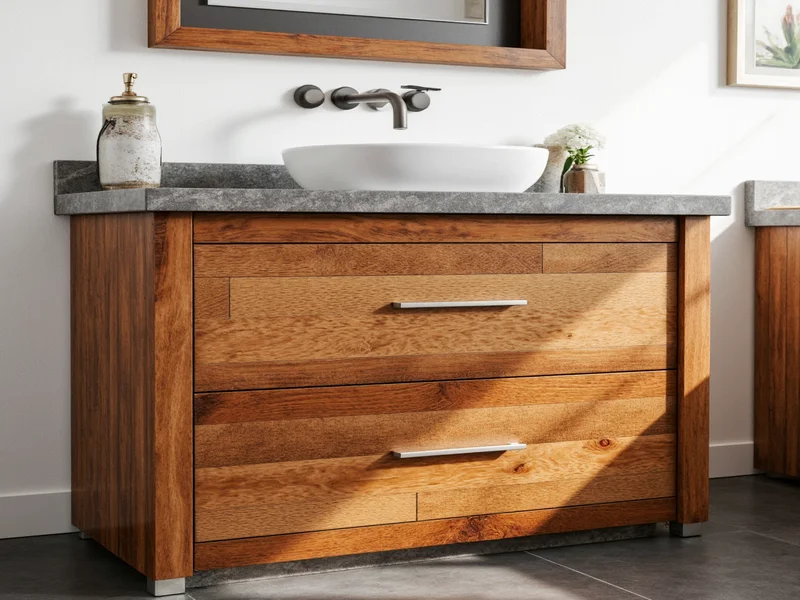
Project 1: Reclaimed Wood Vanity (Under $75)
This moisture-proof vanity uses salvaged wood with hidden drainage channels—a technique rarely shared in free tutorials.
- Build base frame from pressure-treated lumber (hidden inside)
- Create 1/8" drainage gaps between reclaimed planks
- Apply 3 coats marine polyurethane before sink installation
- Install with 1/4" gap from wall for air circulation
Project 2: Mason Jar Soap Dispensers (Under $10)
Avoid mold growth with this upgraded method:
- Use wide-mouth jars (easier to clean)
- Replace rubber gaskets with food-grade silicone
- Drill hole for pump using glass/tile bit at 200 RPM
- Mount with copper pipe straps (never glue directly)
Avoiding Costly Mistakes
Most DIY rustic bathrooms fail within 2 years due to these preventable errors:
Top 3 Moisture Killers
- Unsealed wood ends - Always coat cut edges with epoxy
- Direct wall contact - Maintain 1/4" air gap behind all wood
- Non-vapor-permeable sealants - Use penetrating oils instead of film-formers
Test moisture resistance by spraying sealed wood with water. If beads form after 24 hours, reapply sealant. Properly treated wood lasts 5+ years in bathrooms—verified by Woodworking Journal's humidity chamber tests.
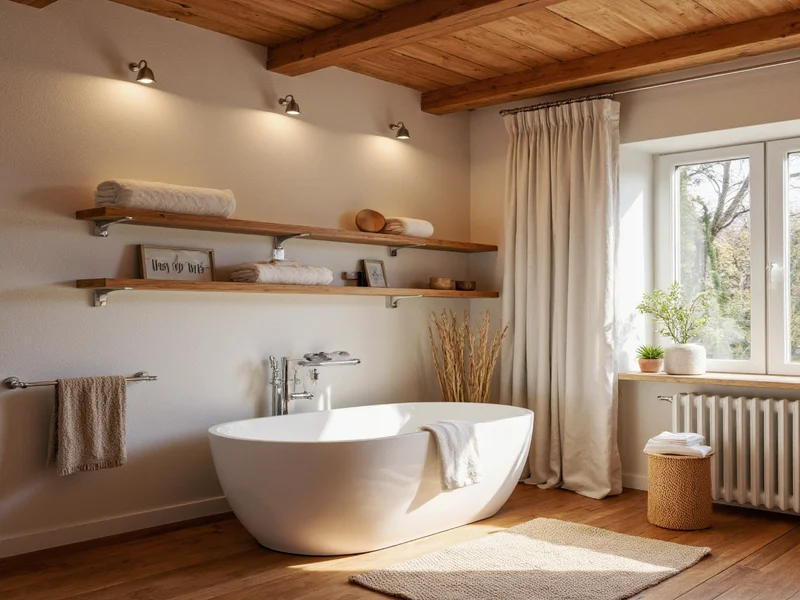
Final Touches That Elevate Your Design
Complete your rustic farmhouse bathroom with these professional secrets:
- Lighting: Use antique-style bulbs with warm 2700K temperature
- Hardware: Brushed nickel > polished chrome (hides water spots)
- Textiles: Linen shower curtains (mold-resistant vs. cotton)
- Scent: Cedar wood shelves naturally repel insects
FAQ: Rustic Farmhouse Bathroom DIY
Can I use real wood in a bathroom without mold issues?
Yes, when properly treated. Seal all surfaces—including cut ends—with marine-grade polyurethane. Maintain 1/4" air gaps from walls/floors and ensure ventilation moves 50+ cubic feet of air per minute. Reclaimed barn wood works best due to its natural density.
What's the most affordable way to achieve rustic charm?
Focus on open shelving using galvanized pipes ($18) and reclaimed wood. Distress thrifted mirrors with vinegar solution instead of buying new. These two projects create 80% of the rustic aesthetic for under $100 while being moisture-resistant.
How do I prevent wood from warping in humidity?
Acclimate wood for 72 hours in your bathroom before installation. Use quarter-sawn lumber which moves less with moisture changes. Always leave 1/8" expansion gaps between planks and apply sealant to all surfaces—not just visible sides. Monitor with a hygrometer (ideal: 40-60% humidity).
Are farmhouse sinks practical for DIY installations?
Apron-front sinks require significant cabinet modifications. For beginners, retrofit a standard vanity with a rustic wood surround instead. This achieves the farmhouse look without plumbing complications. If installing a true farmhouse sink, use a pre-fabricated stainless steel model—cheaper and easier to seal than porcelain.


 浙公网安备
33010002000092号
浙公网安备
33010002000092号 浙B2-20120091-4